Barcode Scanner Configurations – Overview
To use advanced barcode scanning features in the CodeREADr app, you must enable SD PRO on the website’s My Plan page. The Free Plan allows users to select Barcode Scanning Modes directly in the mobile app’s settings. However, a paid plan is required for account administrators to pre-configure Barcode Scanning Modes and enable Smart Scan for authorized app users.
Video: How to Customize Scanner Configurations
Scanning Modes Explained
Batch Mode
Batch Mode allows the app to scan up to 200 barcodes in a single camera view within seconds. Instead of tapping to scan each barcode individually, users can:
- Open the camera and optionally auto-submit up to 100 barcodes at once.
- Limit the number of barcodes scanned in each session.
- De-select unwanted barcodes from the batch before submission.
Features:
- Applicable to primary scans (Tap to Scan screen) and scans made as answers to prompts.
- Auto-insert scanned values into a single field within the app.
- Ideal for high-volume scanning tasks.
- Inserts all scanned values as a single record
Example Use Case: An iPad scanning 30 serial numbers within seconds.
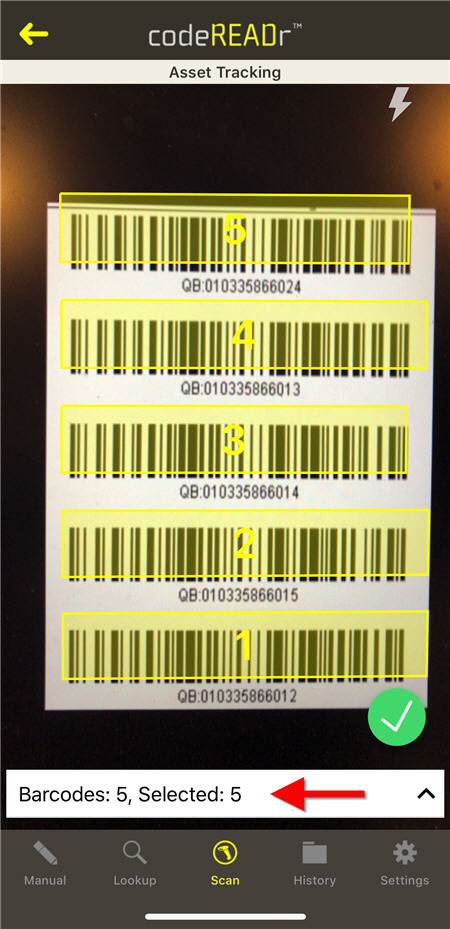
Auto-Insert into a Single Field Within the CodeREADr Application
iPad Scanning 30 Serial Numbers in Seconds
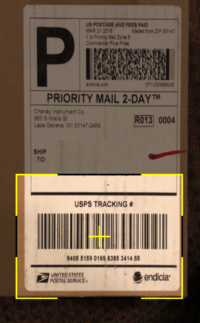
Framing Mode
Framing Mode limits the decoded barcode to only those fully within a predefined frame. This improves accuracy and speed by reducing the chance of misreads.
Key Features:
- Admins can pre-configure the frame size for optimal performance.
- Ideal for Kiosk Mode or scenarios requiring a specific scanning area.
- Users can adjust the frame size if permitted.
- Supports Smart Scan rules for improved targeting and accuracy.
Example Use Case: Providing a clear target area for front-camera scanning in Kiosk Mode.
Targeting Mode
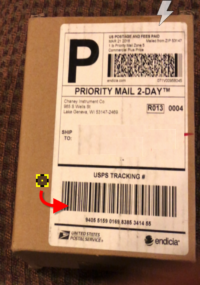
Targeting Mode decodes only the barcode touched by a ‘crosshair.’ This is ideal for scanning when multiple barcodes are tightly packed in the camera’s view.
Key Features:
- Pre-defined crosshair size and shape options.
- Customizable targeting elements (e.g., a box or line).
Example Use Case: Scanning individual barcodes on product labels stacked close together.
Selecting Mode
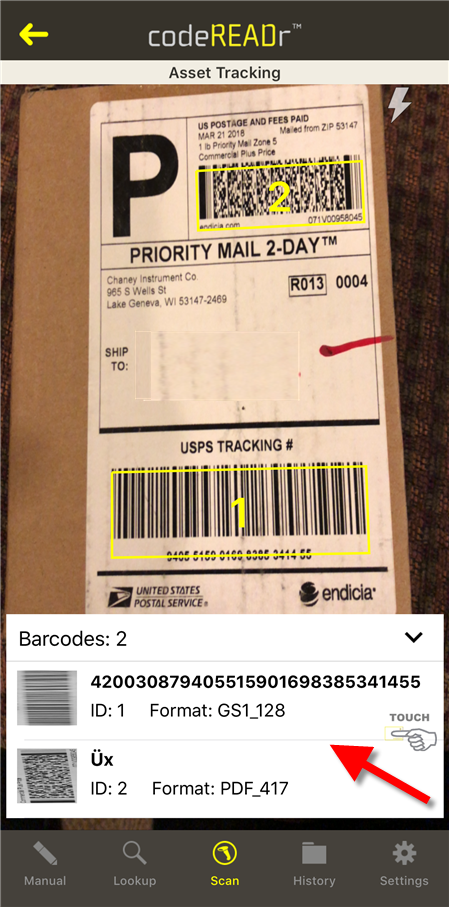
Selecting Mode decodes all barcodes in the camera view and presents them in a list. Users can select one or more barcodes to capture.
Key Features:
- Useful when Smart Scan rules cannot be applied in advance.
- Allows users to prioritize specific barcodes from the list.
Example Use Case: Choosing a specific barcode from a densely populated product shelf.
Fusion Mode
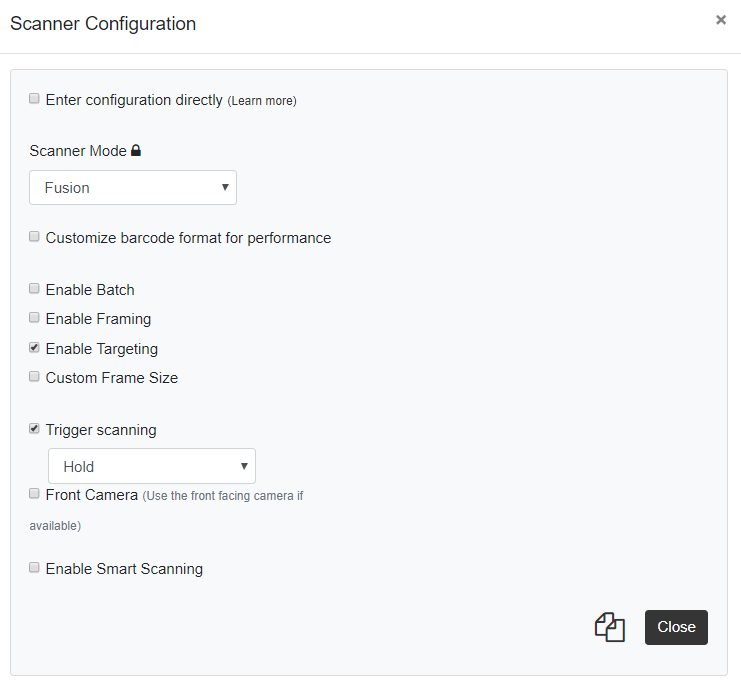
Fusion Mode enables the use of Smart Scan technology across Batch, Framing, and Targeting Modes. It enhances scanning accuracy and efficiency, even with or without Trigger Scan enabled.
Default Mode
Default Mode captures a single barcode in the camera’s view, making it the fastest scanning mode for scenarios without multiple barcodes.
Key Features:
- Smart Scan rules can be applied.
- Efficient for one-at-a-time scanning needs.
Mode Configurations
Enter Configuration Directly
Developers can enter custom JavaScript configurations for advanced functionality. Example:
Tips:
- Use the web UI to configure scanning first.
- Copy the JavaScript from the UI for further customization.
Trigger Scan
Trigger Scan mimics a hardware button to control when a scan occurs. It is ideal for precise alignment or when scanning on demand.
Options:
- Hold: Requires holding an on-screen button to activate scanning.
- Toggle: Allows toggling the scan function on or off via an on-screen button.
- Example Use Case: Lining up the camera with a specific barcode before scanning.
Barcode Format
Admins can select specific barcode symbologies (e.g., Code 128, QR codes) to target. This ensures the app only decodes the required types of barcodes.
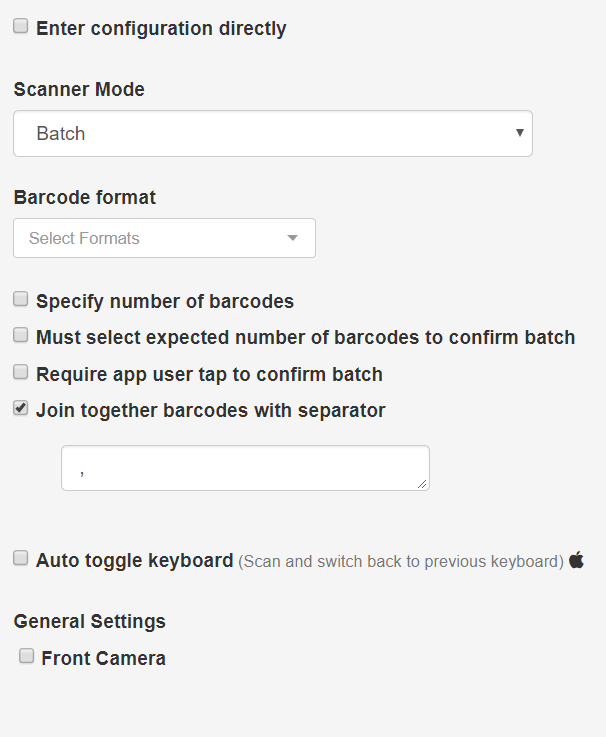
Batch Mode Advanced Settings
- Specify the Number of Barcodes: Set a limit for how many barcodes the app reads per batch.
- Allow submission of fewer barcodes than specified.
- Require exact matches for batch submission.
- Enable manual confirmation before submission.
- Join Barcodes with Separators: Use common separators (comma, semicolon, carriage return) for formatting scanned values. Example: ,\n for a comma and a new line.
Custom Frame Size
For Framing and Targeting Modes, admins can define the frame size and positioning:
- Width and height percentages can be adjusted.
- Centered frames can focus scanning areas more effectively.
Example Configuration:
- Width: 80%
- Height: 20%
Center-aligned for optimal visibility.

Smart Scan
Smart Scan applies advanced rules for decoding and parsing barcodes. While complex to configure, it offers high accuracy for specialized use cases.
Benefits:
- Enables human-readable results for app users.
- Custom parsing and formatting for specific needs.
- Supports actionable alerts and instructions post-scan.
Example Use Case: Decoding and parsing GS1 barcodes with Application Identifiers (AI).
GS1 Barcode Decoding
The CodeREADr app can decode GS1-compliant barcodes and non-compliant barcodes. Using regex patterns, administrators can:
Parse barcode values for human-readable results.
- Apply rules to decode non-compliant barcodes.
- Trigger actionable alerts and messages based on scans.
Learn More:
