What Is Check In/Out?
The Check-In/Out service is for instances that may require your app users to verify the status of a given value. For example, you can use this application in attendance scenarios to record who entered or who didn’t enter. Similarly, you can check in and out assets in a truck, at a physical site, or in a warehouse. The Check-In/Out service can optionally incorporate a checklist to validate against, i.e. limiting what is able to be checked in or out. Also, you can simply use it to record attendance when there is no specific attendance list.
How To Set Up Check-In/Out
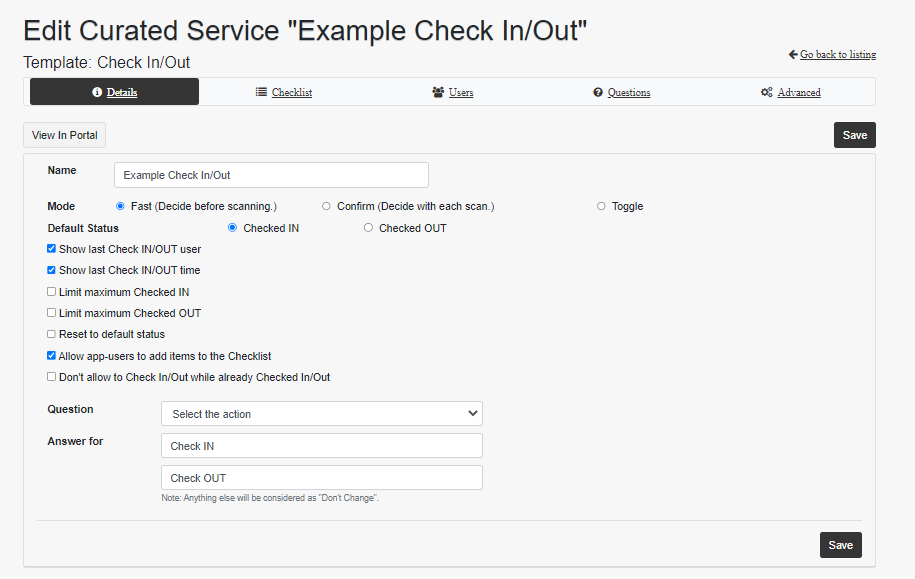
1. First, you can name your service. Then, choose the preferred Mode.
- Fast Mode: With the fast mode, the app user will be prompted to select the action they are taking for a sequential series of scans. For example, they would select “check-in” if they are checking in items/attendees at the start of the day. The app user would later change the action to “check-out” at the end of the day.
- Confirm Mode: With the confirm mode. the app user needs to select check-in or check-out for every scan.
- Toggle Mode: With the toggle mode, the app user doesn’t have to ever select check in or check out. The selection of this option will automatically check the item/attendee in with the first scan and then our with the next scan.
2. Next, you can choose a default for unscanned values. Logically, it asks you to define the value. For example, if you are using the service for attendance, anyone not scanned is checked out. Whereas, if you are using the service for tracking assets (e.g. equipment, vehicles, etc.) any unscanned item is checked in.
3. Then, you can show the last user scanning and/or times for a given value to the current app user. You are given the option to disallow check-ins/outs when the value is already checked in/out. This means, if a value is checked in and the user attempts to select check-in again, the answer will be recorded as invalid. However, you can choose to show the check-in/out question with each duplicate scan or not. This gives the user the option to select the opposite of what is the current status so that they may submit a valid scan. This is shown below for greater clarity.
4. Additionally, you may edit the question asked with each check-in/out. You can select any question you’ve created for all services through the Question tab of your account. If you would like to input a new question, you will need to add it via the Questions tab. Learn how to collect data with questions here. Leaving it as is or “create automatically” will retain the Check-In and Check-Out options as well as keep the question being asked as “Select the action.” However, you may want to change what this question says as shown in the example below.

5. Finally, you have the option to limit a maximum of checked-in and/or checked out items. When you enter a limit, anything scanned beyond that number will be marked as invalid until more values are checked out. For example, if the limit is 3 total checked-in values when a fourth value is scanned, it will return as invalid. All subsequent scans will remain invalid until a value is checked out and the total number is back under the limit.
6. You can use a checklist to validate against. Please look here for the article explaining how to import your checklist.
7. How to download check-in/out records:
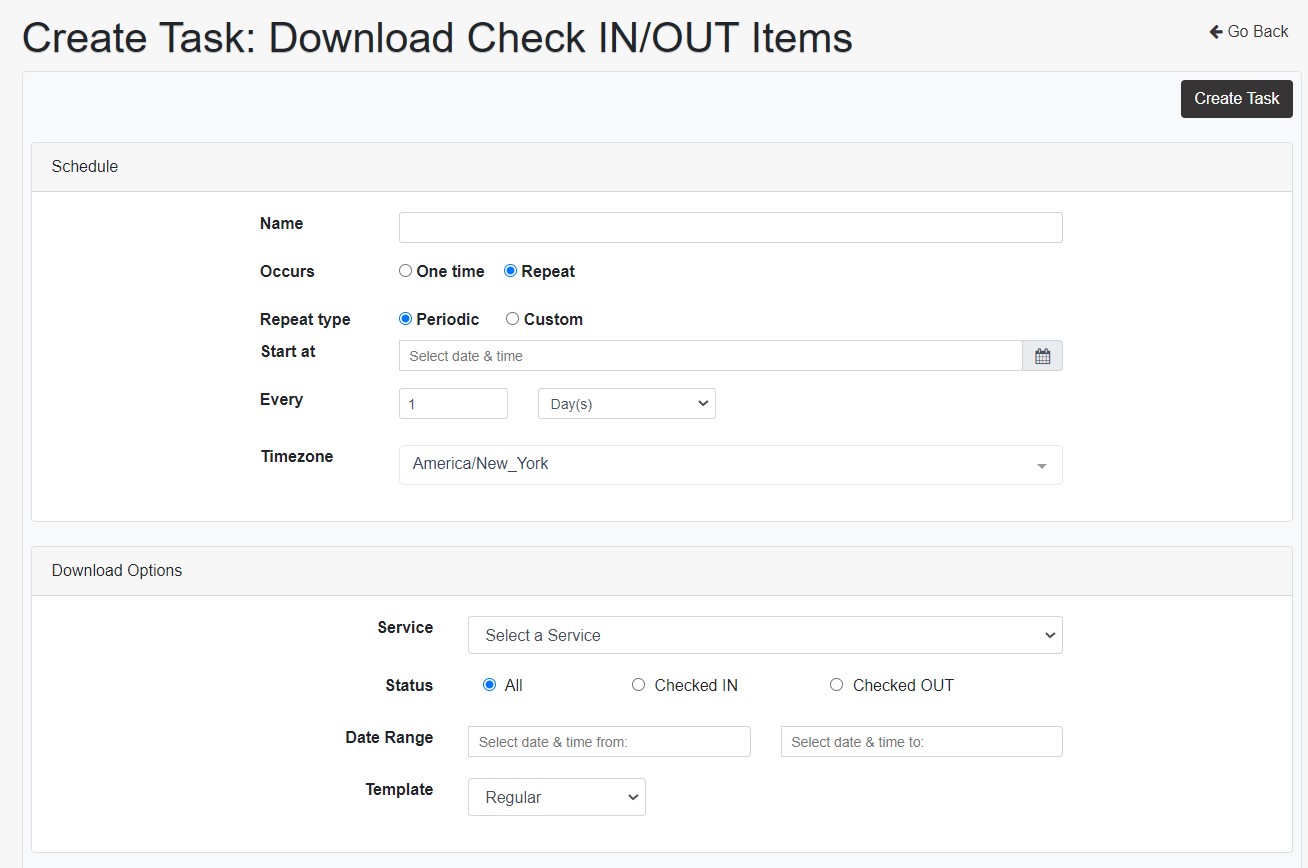
You can find this feature on the tasks page by clicking “Add a Task.” This task is made specifically for Check In/Out services and has some special options to enhance your reporting.
At the top of the creation page, you’ll see scheduling options. As with all tasks, you can choose to schedule your export periodically or just download the scans once. Using the custom schedule option allows you to create multiple tasks for different repetitions if need be.
The second half of the page is where you’ll find the filtering options specific to Check-In/Out. After selecting the service you’d like to see scans for you can choose whether you’d like to include only check-ins, check-outs, or both. Next, we have an option to include a check-in or out for values not checked in or out when scanning. What this means is the spreadsheet will be modified to include a second timestamp for your values but the status of the values will not actually be changed on CodeREADr.
For example, let’s say you have employees that need to clock in and out each day. You can set the spreadsheet to automatically check everyone out at 5 pm. This will not change any values in the app or on the website to be checked out but it will show in your report who stayed until the required time each day.
Additionally, you can filter the export to include only a specific range of dates as needed. The start date is required to create the task but the end date by default is the current day. Finally, you have three options for the template- what’s included- in the export.
The descriptions for each are noted below.
Regular: The default template includes only the most recent timestamp and status for each value.
Extended: This template includes the first status and timestamp for each value as well as the last status (if more than 1 scan record) for each value. It also includes a “duration” column showing the difference between the two times for each value, reported in milliseconds.
History: This template builds on the extended template, including all of the timestamps and statuses for every value.
What Does It Look Like?
From here, you can finish your services. You can add users, questions, and alter advanced settings. However, no questions or advanced settings are necessary for the service to work properly. Below, we walk through how to use the service in-app.
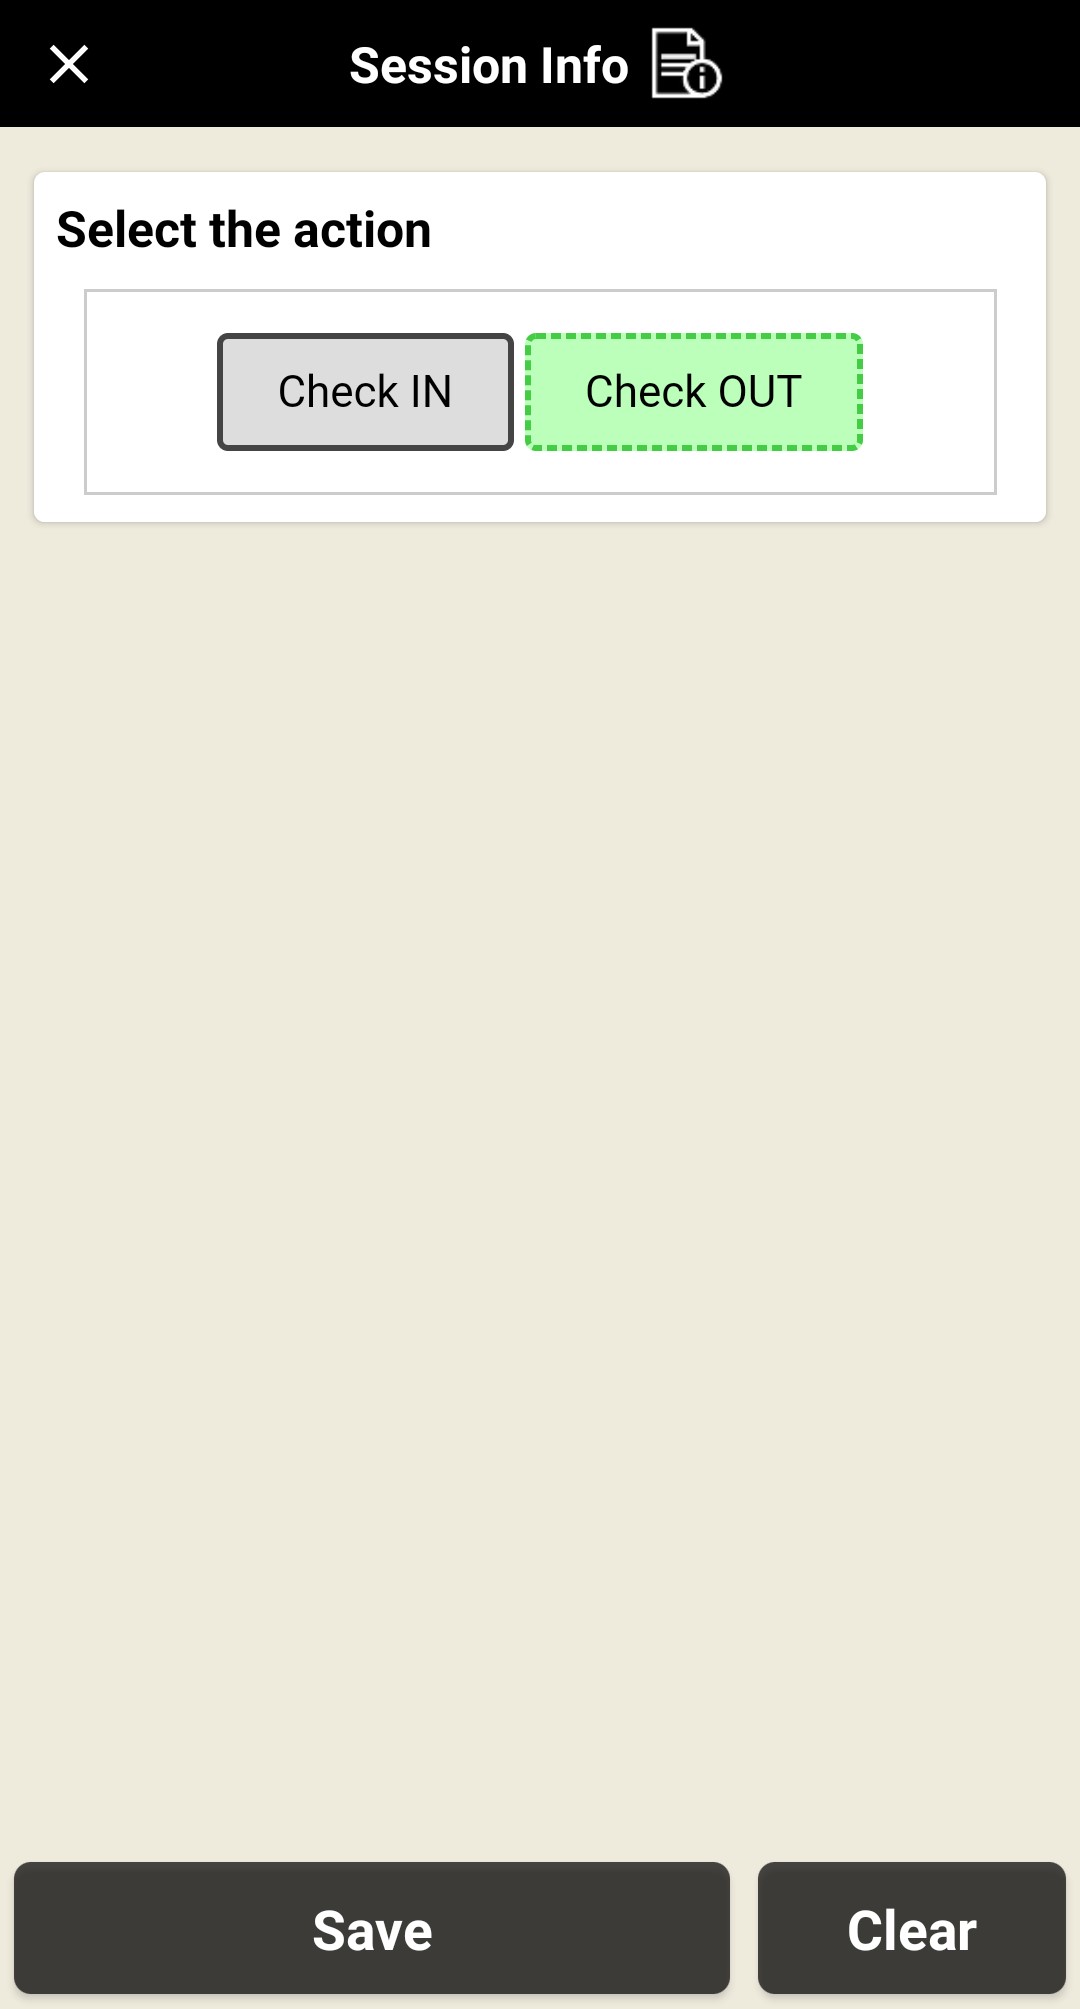
When your authorized mobile app user(s) choose this service on the mobile app, they will see this screen:

In this example, we need the session info because we are using Fast Mode.

Once you choose the action, you can proceed to scan. Checked IN valid scans appear like this:

All valid scans will appear this way until a new action is chosen:
When you select Check OUT, all valid scans will appear as so:

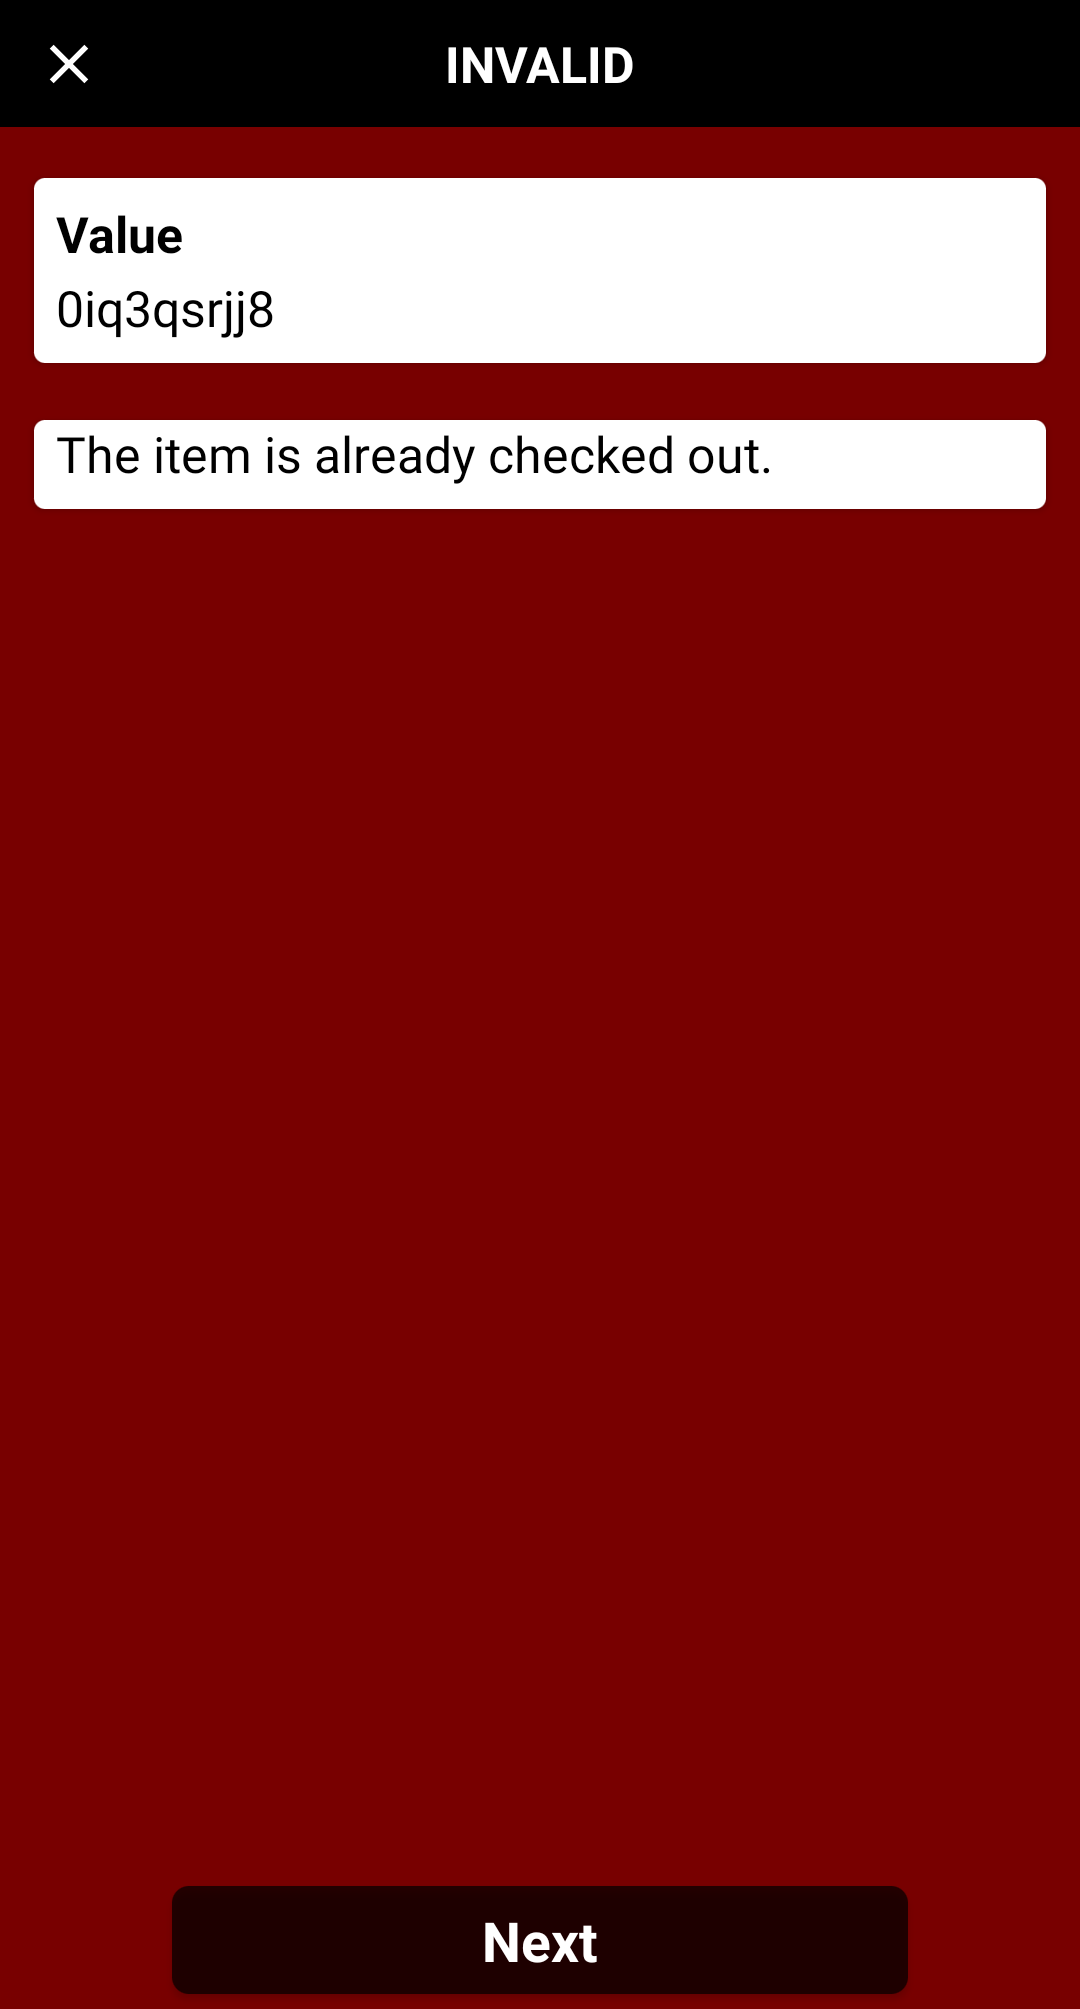
In Fast Mode with duplicate Check-In/Out disallowed but the question not shown, invalid scans appear as so.
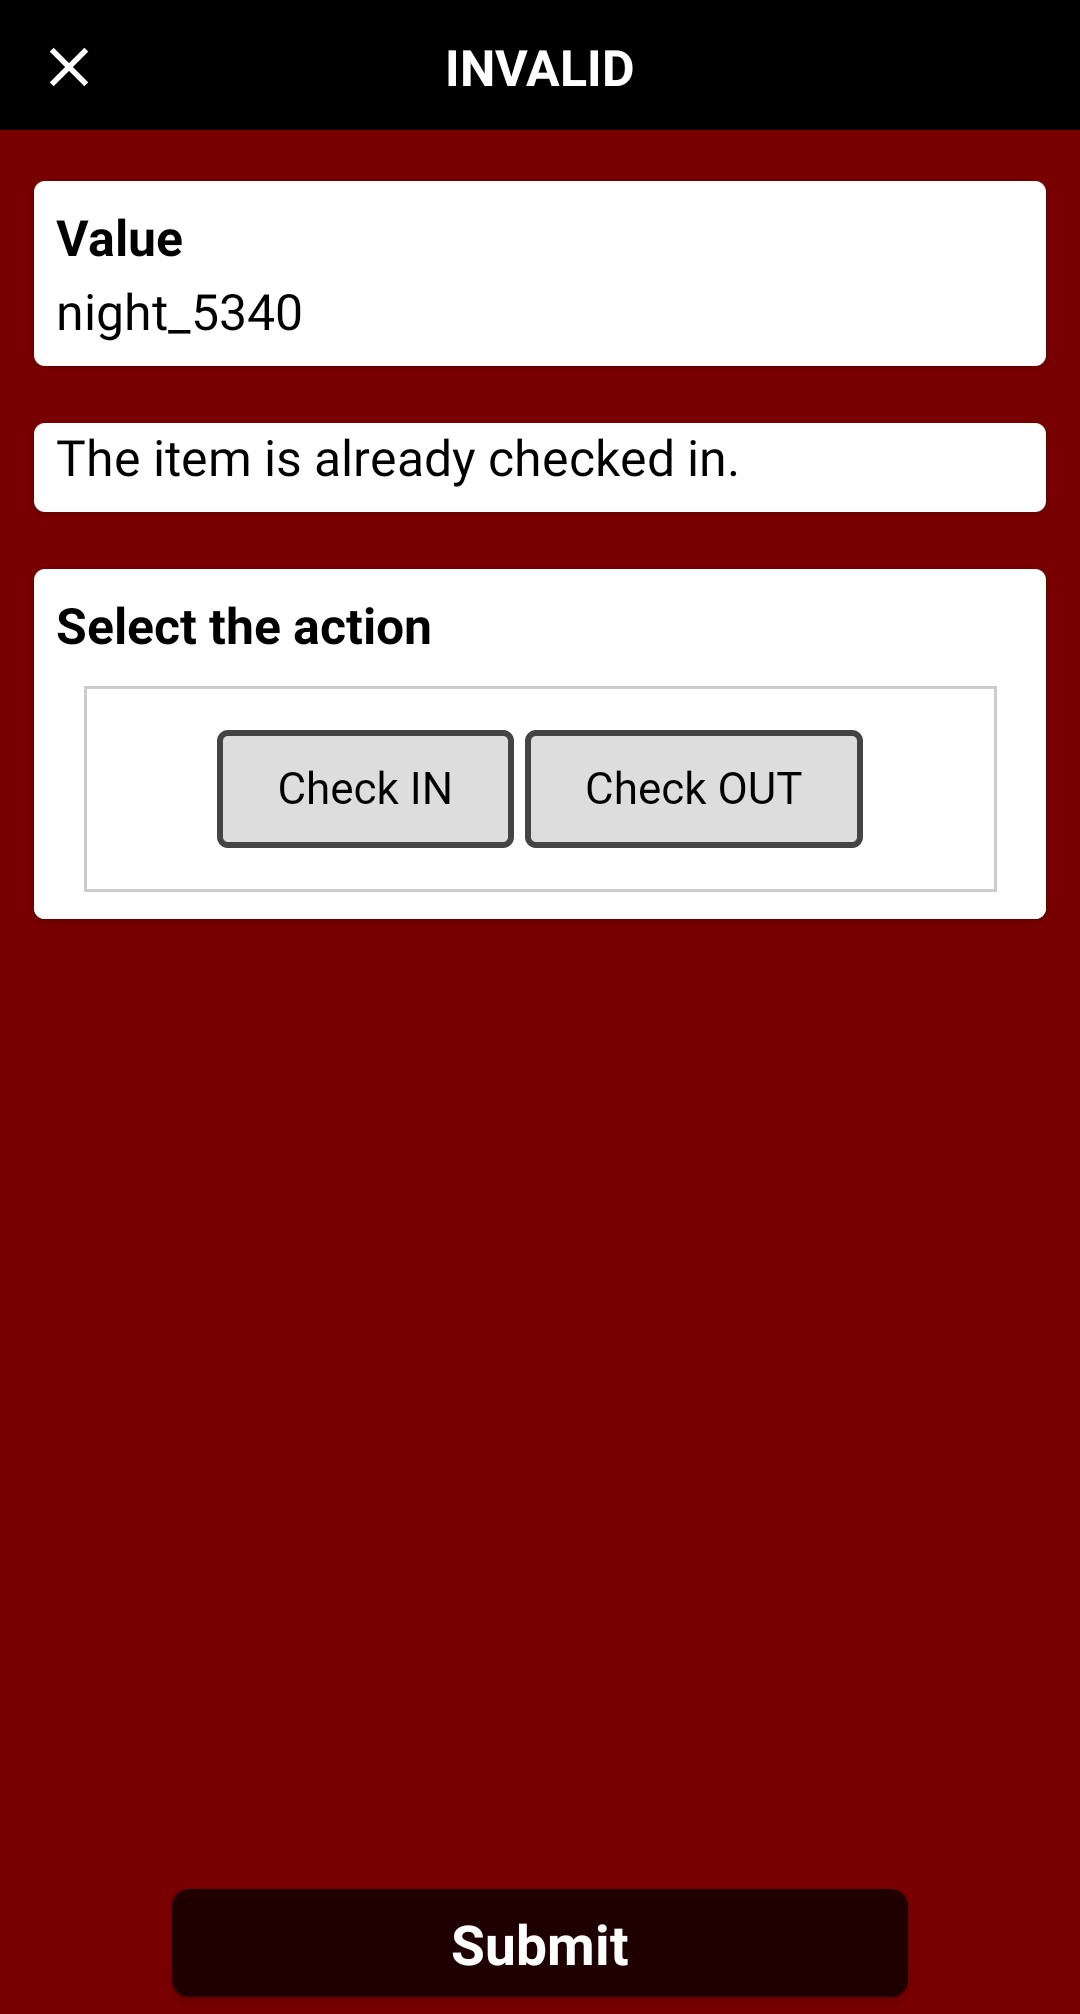
In Fast Mode with duplicates disallowed and the question asked again, invalid duplicates will be shown with the option to answer much like in Confirm Mode. Selecting an option here does NOT change the session info for subsequent scans.
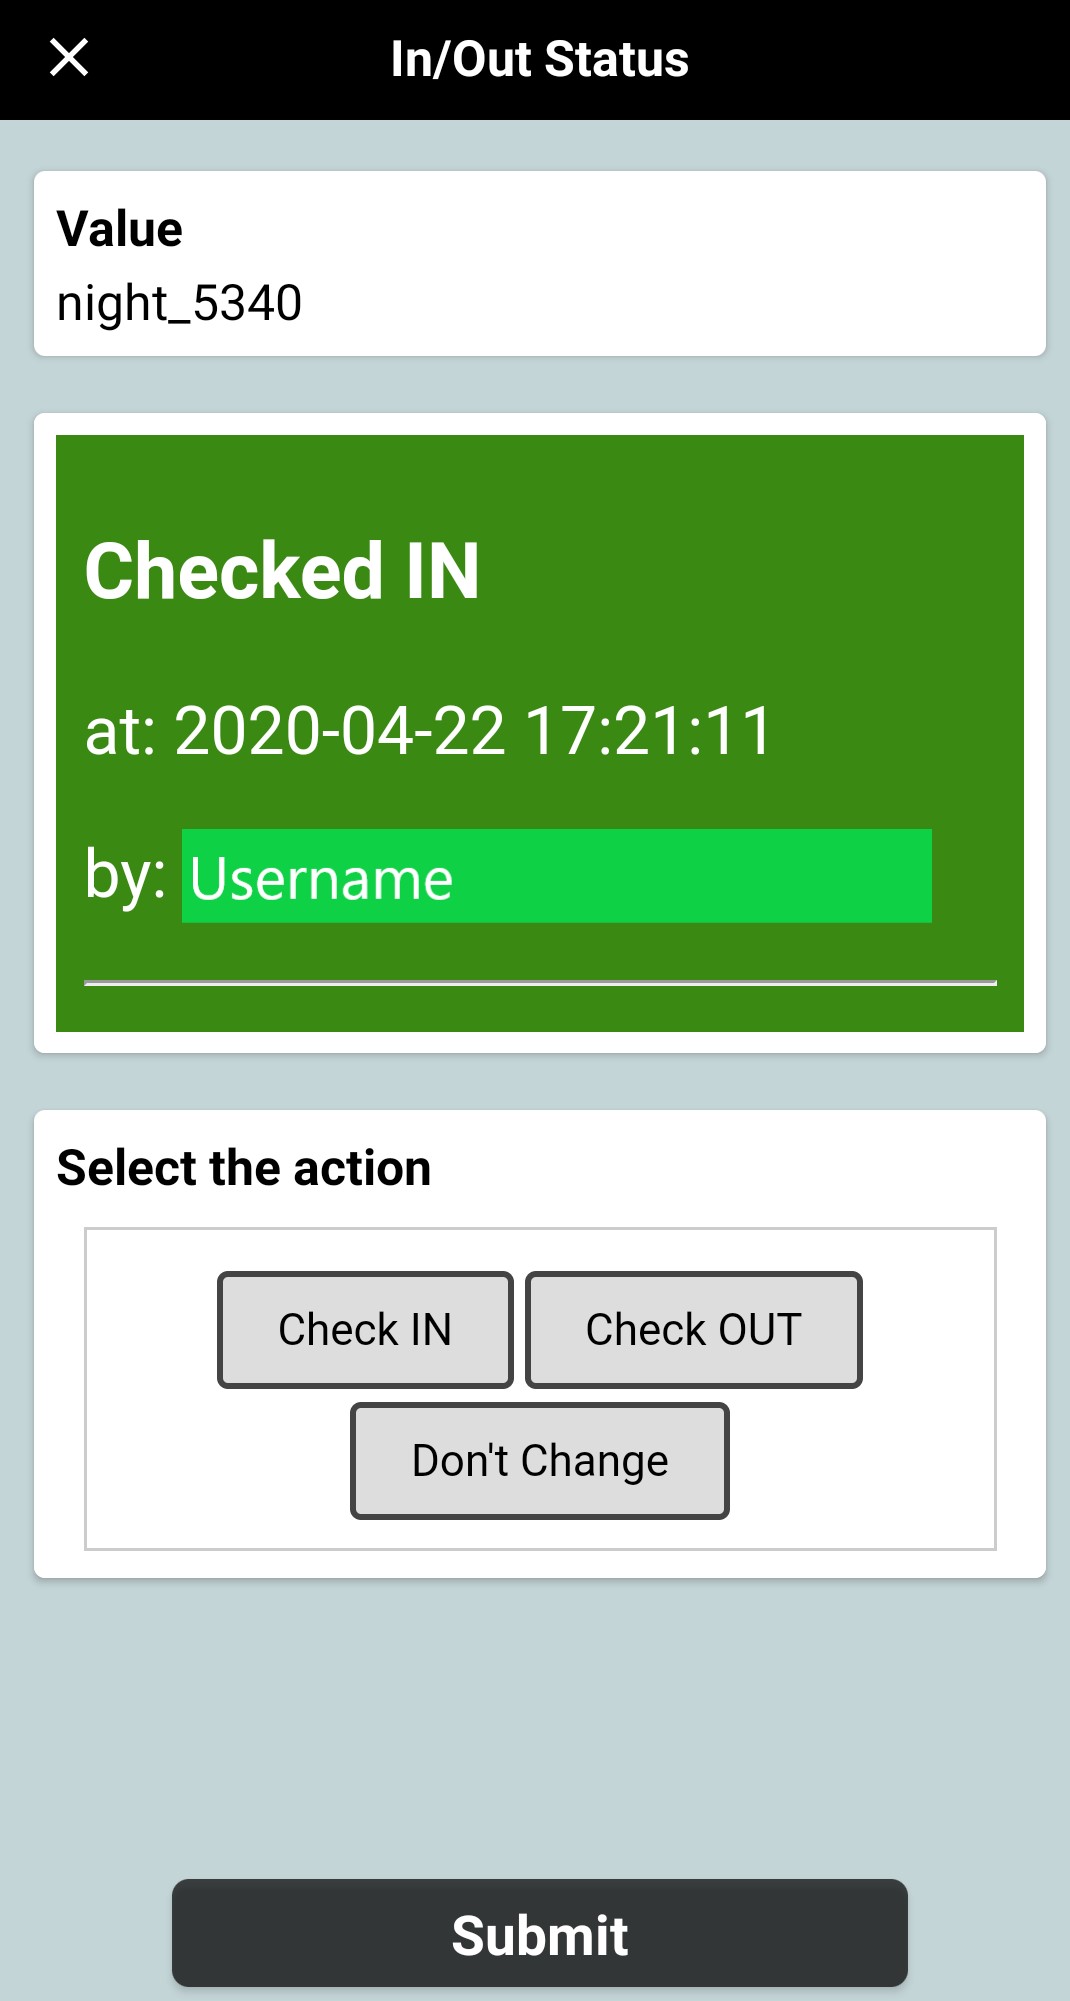
As with any service, you can customize the display of the response. This image shows the default response. If you have selected Confirm Mode, there will be no session info to select on the app screen. Instead, with each scan, the default (either Checked IN or out based on what you designated on Step 2) will appear and the user can define the action for that scan:
Web Portal
On the CodeREADr website, you can view your Checked IN and Checked OUT statuses by clicking “View Items in Portal”. You should refresh this view as often as necessary.


On the lookup page, you will see you can also sort by a few different options. The dropdown includes the following:
ID – This orders the list numerically/alphabetically by the barcode value
Description – This orders the list alphabetically by the response value
Timestamp – This orders the list by the time the scan was taken
ASC/DESC – This refers to ascending and descending as a way of ordering the list
On the mobile app, your app user(s) can view statuses by clicking on the “Lookup” tab. It auto-refreshes the in-app web view. However, you can manually refresh by tapping the refresh icon.

Manage Records
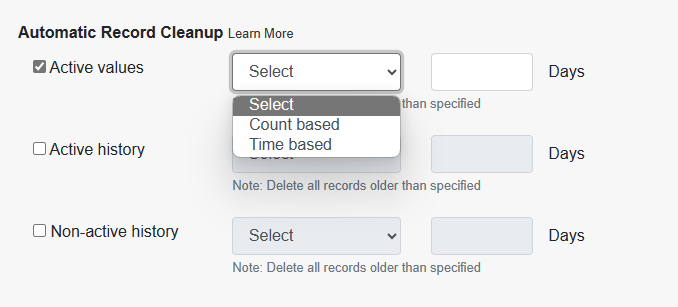
Automatic Record Cleanup
This is an important tool to manage your checklist and the scan records for this service. Creating rules here will improve your experience as an administrator and for your app users. Also, as with any application that stores and executes records, the smaller number of records your have the lower your data usage will be.
For each cleanup action you can specify Count based or Time based. Count based means you specify a certain number of total record you want to keep at all times. Time based means you specify a certain number of days within which you want to keep records.
Active Values
Active values refers to the checklist itself. Your checklist might include values that are no longer needed. By using this action you can reduce the checklist based on the total number of values in the checklist or the age of the values. So, for example, maybe the list changes monthly, quarterly, or annually. You can delete the older values to keep your list up-to-date.
Active History
Active history refers to the storage and viewing of In and Out records. Here, “active” refers to values that are still in the checklist and therefore can be checked in or out.
Non-Active History
Non-active history also refers to the storage and viewing of In and Out records, However, “inactive” refers to values that are no longer in the checklist and therefore cannot be checked in or out.
