Table of Contents
Enhance Your Scan Response Display
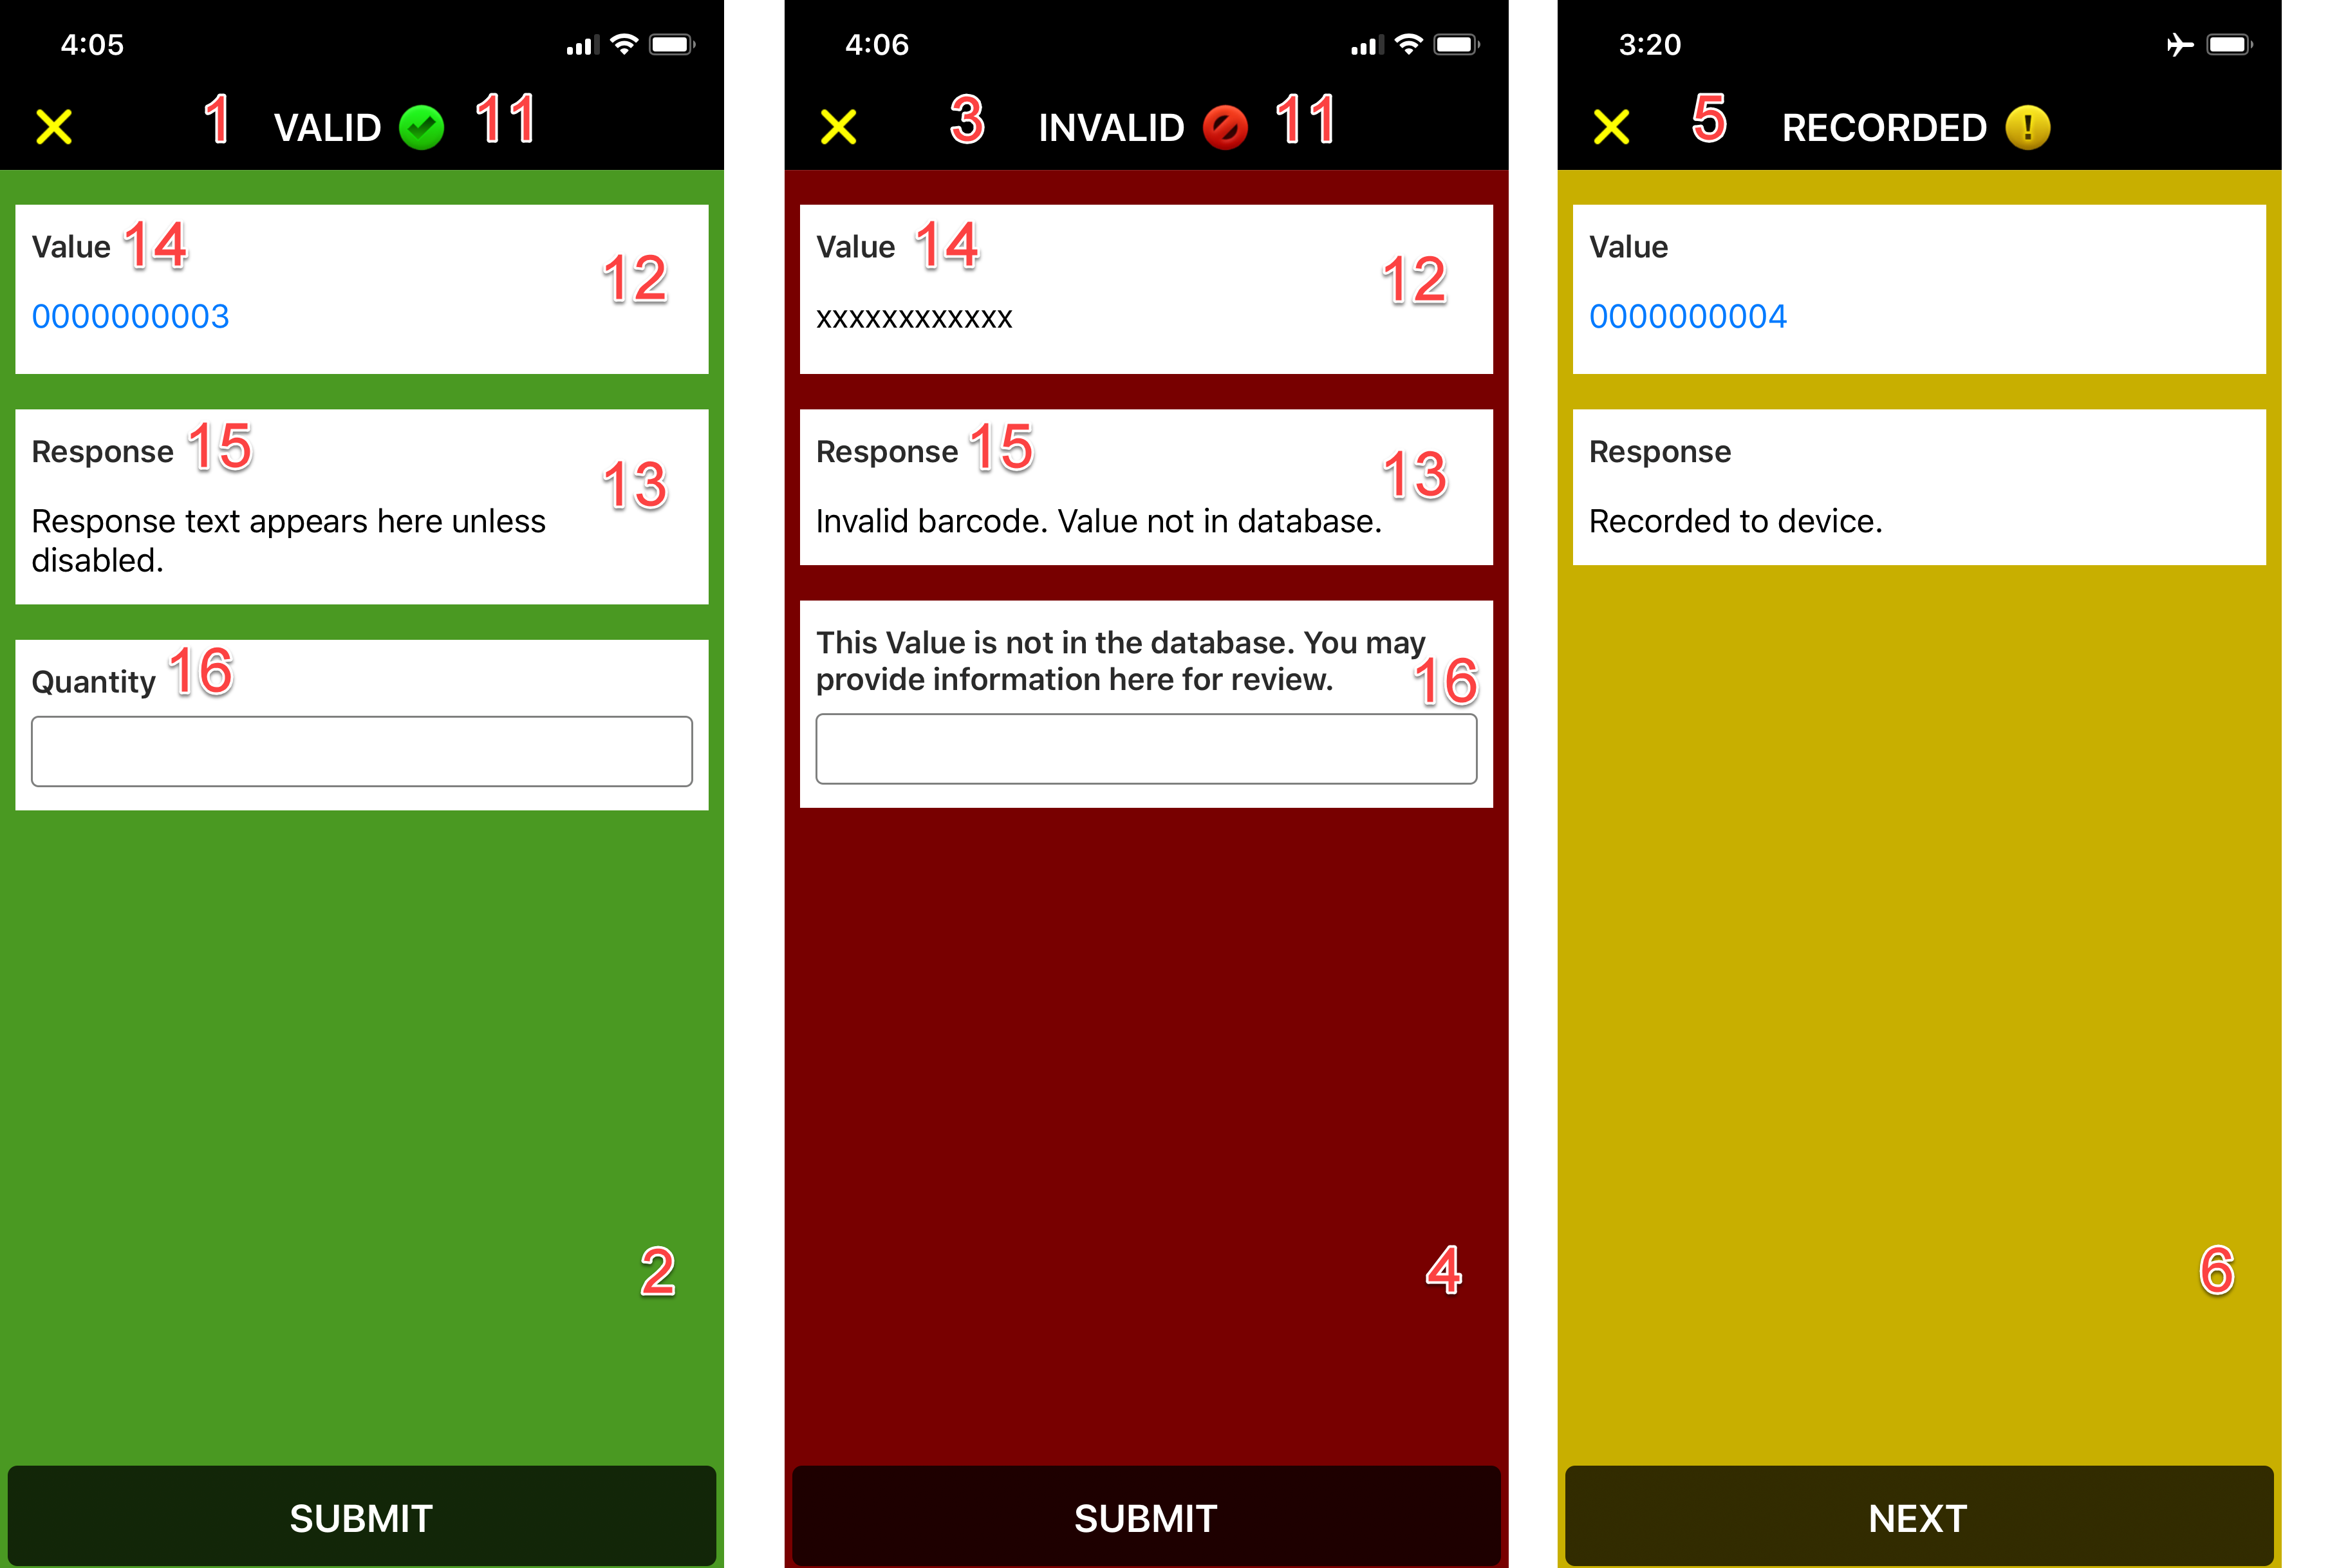
Customizing the scan response display allows you to tailor what users see after a scan. This can be done using the Alter Response feature or through the Enable Custom Display Configuration option in the Advanced settings when creating or editing your services.
By enabling this option, you can remove specific elements, edit labels, and define custom colors. This guide provides a detailed breakdown of how to configure these settings for a seamless user experience.
Steps to Enable Custom Display Configuration
- Navigate to Advanced Settings
- While creating or editing your service, locate the Enable custom display configuration checkbox in the Advanced step and select it.
- Edit Labels and Colors
- Use the provided form field to input your custom JSON configuration.
- Update labels by entering your desired text between the quotes (“”) after the colon (:).
- Define colors using hexadecimal color codes. You can utilize the color picker tool under the form field for convenience.
- Paste Your Custom JSON
- Below is an example of a customizable JSON structure
Copy to Clipboard
Pro Tip: The last option in the JSON (e.g., question_labels_hidden) should not have a trailing comma. Ensure your syntax is error-free before saving.
Editable Variables Explained
| Variable | Function |
|---|---|
| status_title_valid | Sets the title for a successful scan. |
| status_color_valid | Defines the color for a successful scan. |
| status_title_invalid | Sets the title for an invalid scan. |
| status_color_invalid | Defines the color for an invalid scan. |
| status_title_warning | Sets the title for a warning. |
| status_color_warning | Defines the color for a warning. |
| status_title_presubmit | Title for the presubmit question screen. |
| status_color_presubmit | Color for the presubmit question screen. |
| status_title_default | Sets a default title for all statuses. |
| status_color_default | Sets a default color for all statuses. |
| status_icon_hidden | Hides the status icon when set to “true”. |
| value_hidden | Hides the value field when set to “true”. |
| response_hidden | Hides the response field when set to “true”. |
| value_label | Customizes the label for the value field. |
| response_label | Customizes the label for the response field. |
| question_labels_hidden | Hides specific question labels (input IDs separated by commas). |

Final Tips for Successful Configuration
- Validate Your JSON: Always double-check your JSON syntax before saving. Use an online JSON validator if needed.
- Use Meaningful Labels: Ensure your labels and colors provide clarity to enhance the user experience.
- Experiment Safely: Test your configuration in a development environment before deploying it live.
By following these steps, you can create a highly customized and user-friendly scan response display tailored to your specific needs.