June 20, 2011 • 2 min read
Optimizing Event Security and Efficiency with Barcode Scanning for Access Control

CATEGORIES
SOCIAL SHARE
Electronic Ticketing and Barcode Scanning for Access Control
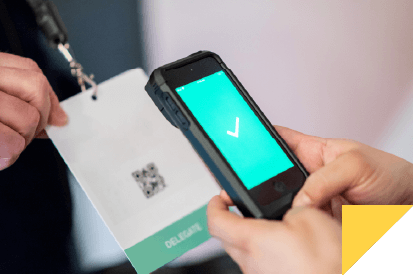
In the world of entertainment and event management, the advent of electronic ticketing and barcode scanning for access control has revolutionized how events are organized and attended. However, this technology comes with its own set of challenges, such as the potential for ticket duplication and issues with Internet connectivity in densely populated venues. Addressing these concerns, solutions like CodeREADr have emerged, offering robust features for the invalidation of duplicate tickets, offline authentication, manual barcode value entry, and comprehensive database searches, making them invaluable for both large-scale events and intimate gatherings.
This guide is dedicated to unveiling the functionalities of our smartphone app and web interface tailored specifically for electronic ticketing. We aim to demonstrate the versatile deployment of CodeREADr for efficient barcode access control, whether you’re leveraging its most advanced features or its basic functionalities.
Barcode Scanning for Ticket Validation: A Closer Look at CodeREADr
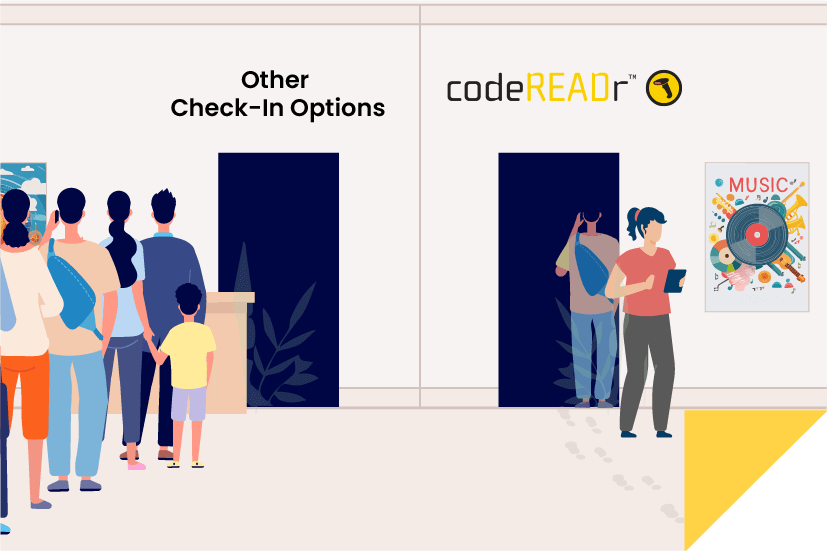
For event organizers and electronic ticketing service providers, creating a dedicated service for each event is now a streamlined process. CodeREADr offers both online and offline services to cater to different venue needs. For locations with intermittent Internet access, the app smartly defaults to on-device recording, ensuring no disruption in the scanning process. This is particularly useful in venues where Internet connectivity is a challenge, especially near entrances or during peak times when attendees are also accessing the web.
Online vs. Offline Scanning Services
Real-time scanning necessitates reliable Internet connectivity. However, for venues where this might be an issue, CodeREADr’s on-device services provide a fail-safe option. The app’s auto-sync feature further enhances efficiency by validating scans against a pre-downloaded database, reducing connection latency and ensuring seamless operations even in offline mode.
Selecting the Right Service for Your Event
- On-Device Record Scans: Ideal for quick deployment, this service allows for immediate scanning without validating against duplicate or invalid tickets, with the option to upload data post-event for analysis.
- On-Device Validation: Suited for scenarios with uncertain internet connectivity, this service validates ticket IDs uploaded beforehand, offering a streamlined entry process.
- Validate Scans Online: For venues with stable internet, this service offers real-time validation against online databases, providing instant feedback on ticket authenticity.
- Advanced Integration with Postback URL / APIs: Tailored for events with ongoing ticket sales or high security regarding invalid or duplicate tickets, this option requires technical integration but offers the highest level of control and security.
Managing Databases for Effective Access Control
Creating and managing databases for ticket validation is straightforward with CodeREADr. Whether using a simple CSV file upload or integrating with your servers via Postback URL, you can ensure that only valid tickets grant access to your event, enhancing security and attendee experience.
Empowering Staff with CodeREADr App Users
Configuring app users and setting device limits is essential for maintaining security and efficiency. CodeREADr enables event organizers to assign unique credentials to staff, ensuring accountability and smooth operations across multiple entrances and events.
Leveraging Data Collection for Enhanced Guest Experiences
CodeREADr’s data collection feature allows for the gathering of valuable attendee information through manual entry or multiple-choice questions, aiding in demographic analysis and personalized attendee engagement.
Optimizing Your Event with the Right Barcode Types
QR codes are recommended for their ease of scanning, especially from mobile devices, enhancing the speed and reliability of access control. For traditional ticket formats, 1D barcodes remain a viable option, with ongoing improvements in scanning technology ensuring compatibility and efficiency.
Ensuring Smooth Operations on the Day of the Event
From calculating the required number of devices to managing battery life and optimizing ticket printing, preparing for event day is crucial. Practicing scanning, ensuring devices are fully charged, and setting up devices with the correct services and databases in advance can significantly impact the success of your event.
By incorporating advanced barcode scanning and access control technologies like CodeREADr, event organizers can significantly improve security, efficiency, and attendee satisfaction, making every event a seamless experience. Learn more about getting started with CodeREADr here.