Oct 30, 2026 • 6 min read
Verify Manifest: One Barcode, the Whole Order
CATEGORIES
SOCIAL SHARE
Verify every pick, pack, and receipt against a list you already have, using the barcodes already on your items. One manifest barcode carries the whole order. No ERP, WMS, or database integration required.
Most order errors aren’t mysterious. The wrong size gets picked, a carton is left off the pallet, or a case meant for one order ends up in another. They’re easy to catch at the moment an item is handled, and expensive to sort out once the shipment has left the dock.
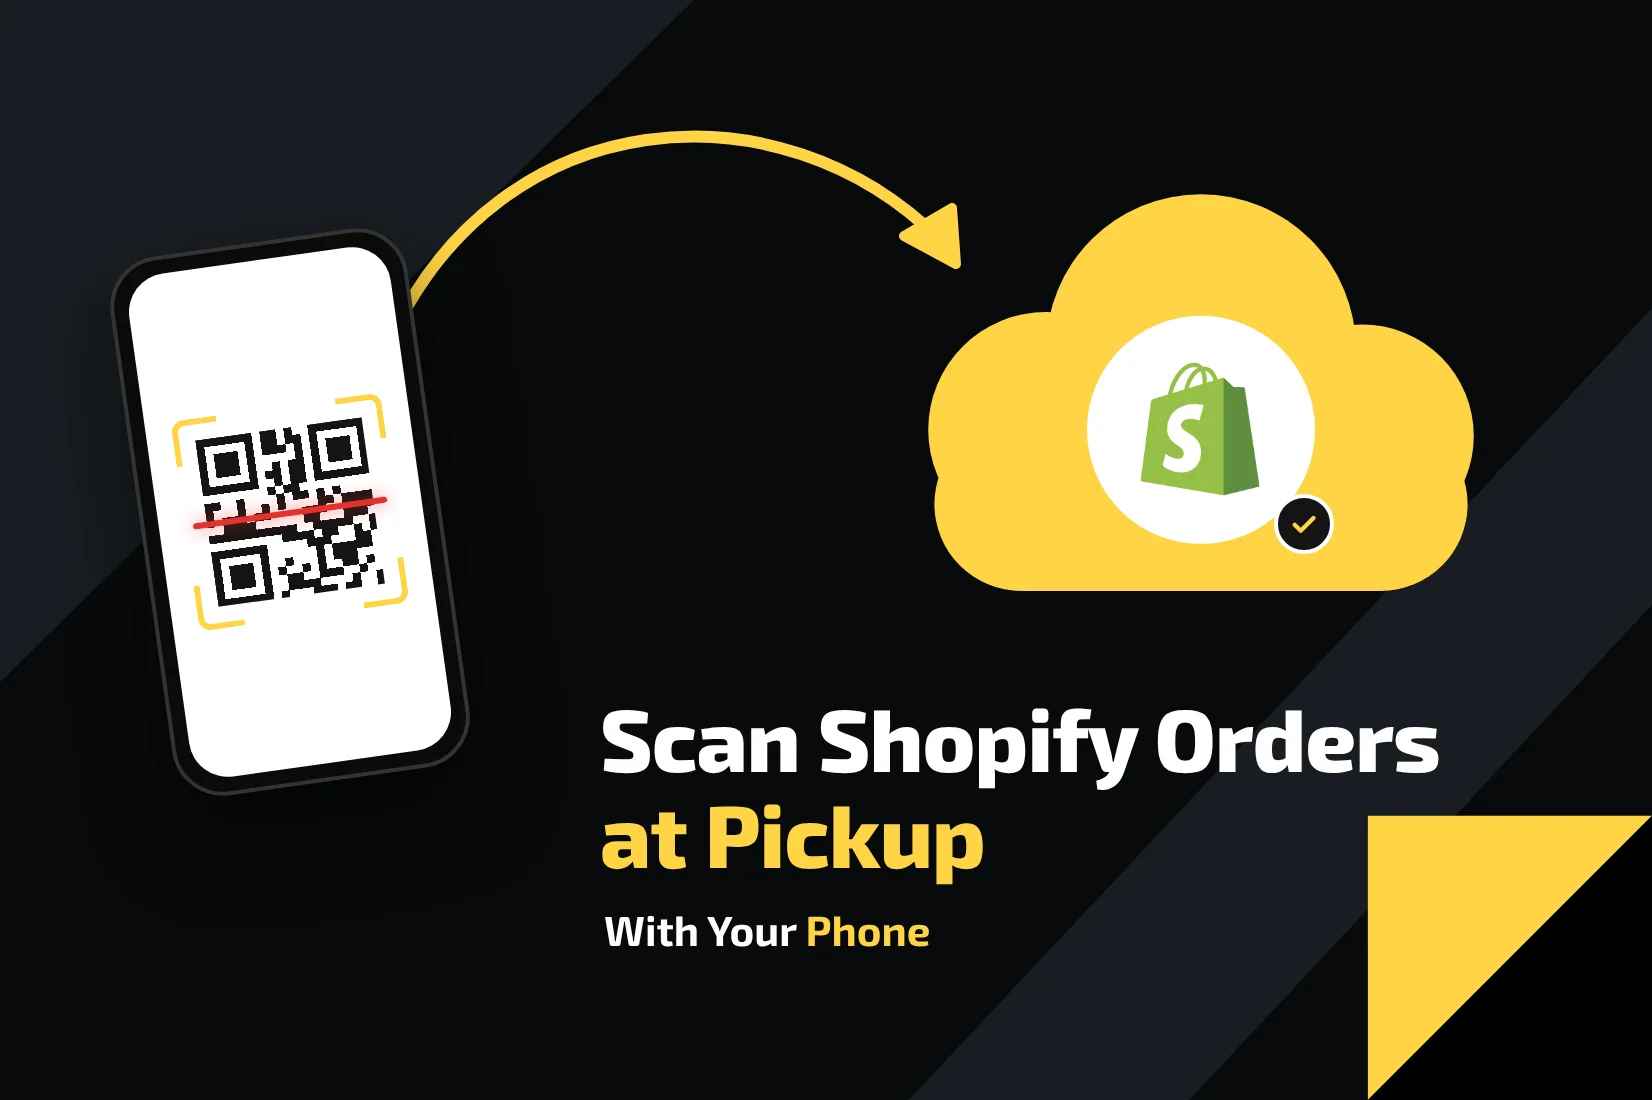
Verify Manifest, CodeREADr’s newest specialized service, checks each item against the order as it’s scanned. You print one manifest barcode for the list, such as a QR code on the packing slip or pick ticket. Your team scans it, then scans each item’s own UPC or SKU barcode, and the app tells them right away whether that item belongs.
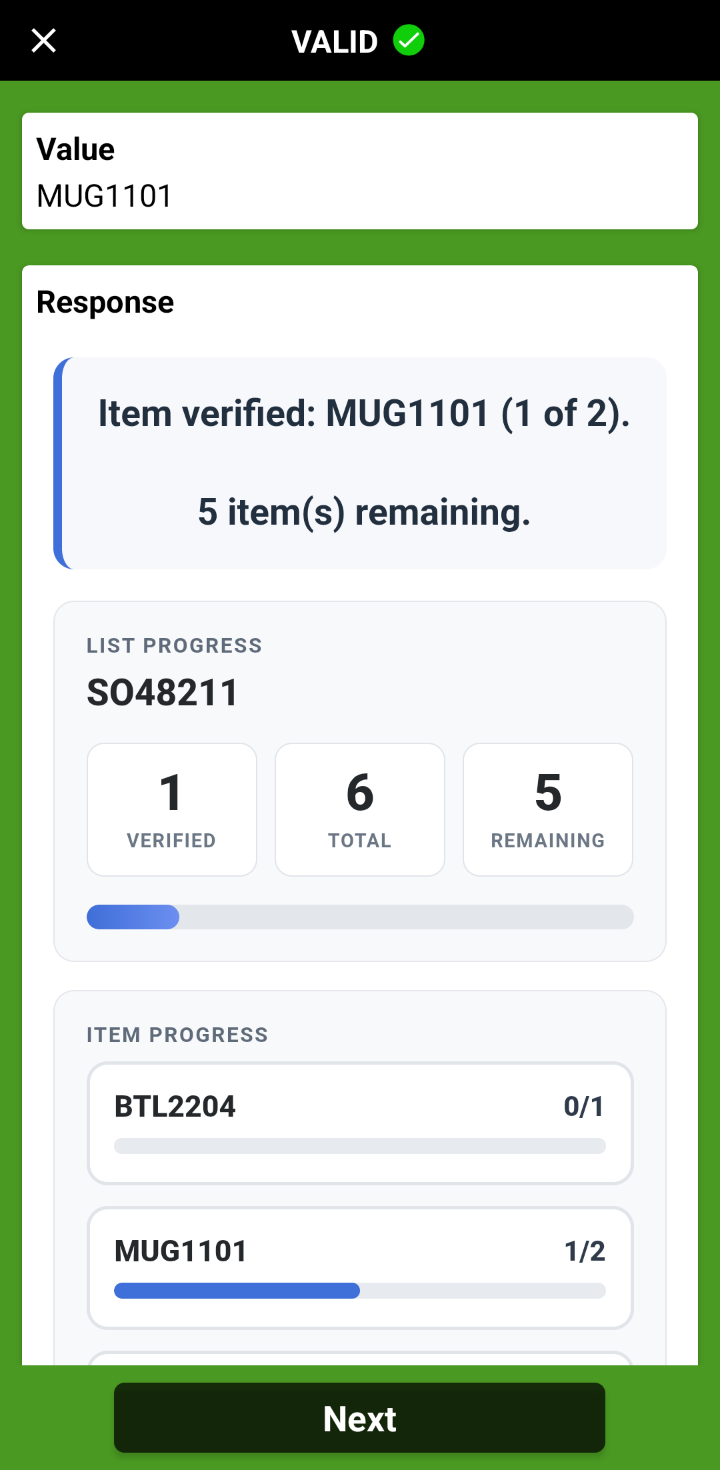
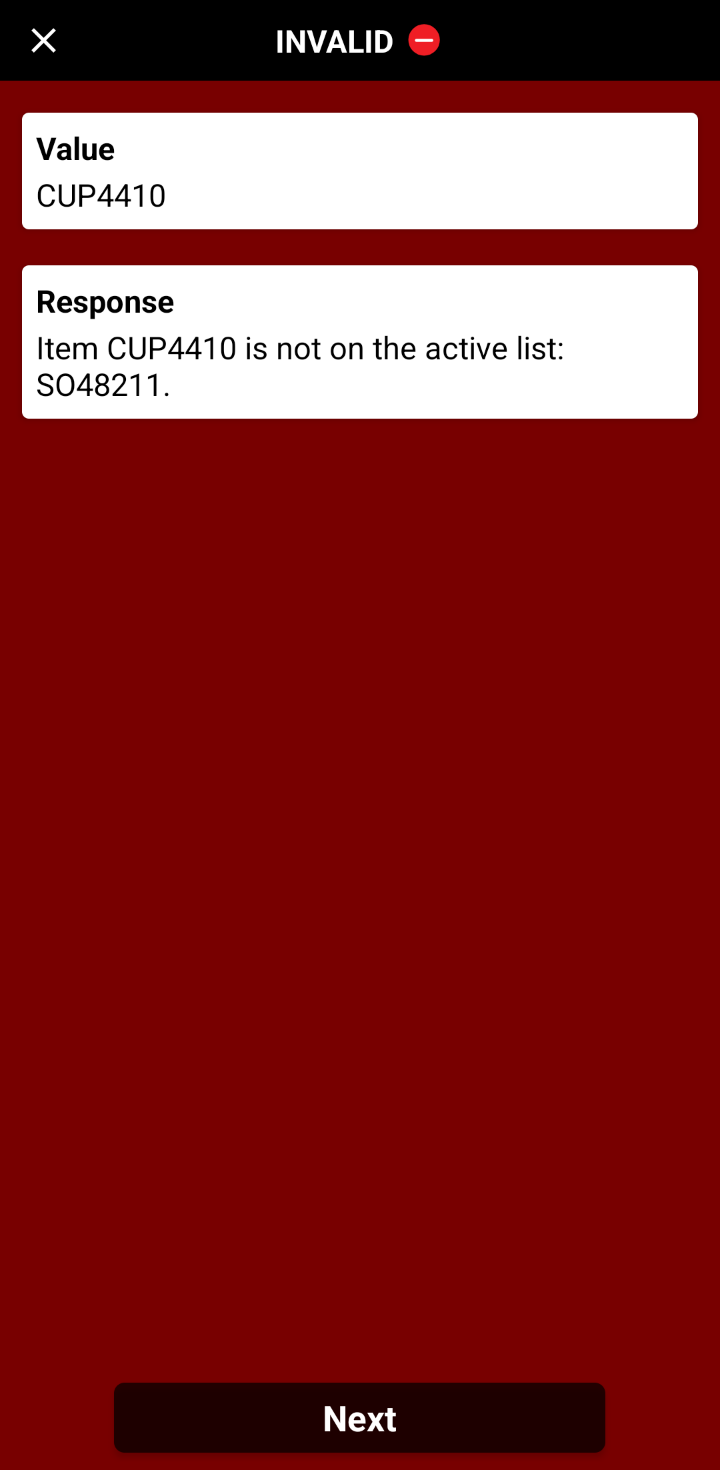
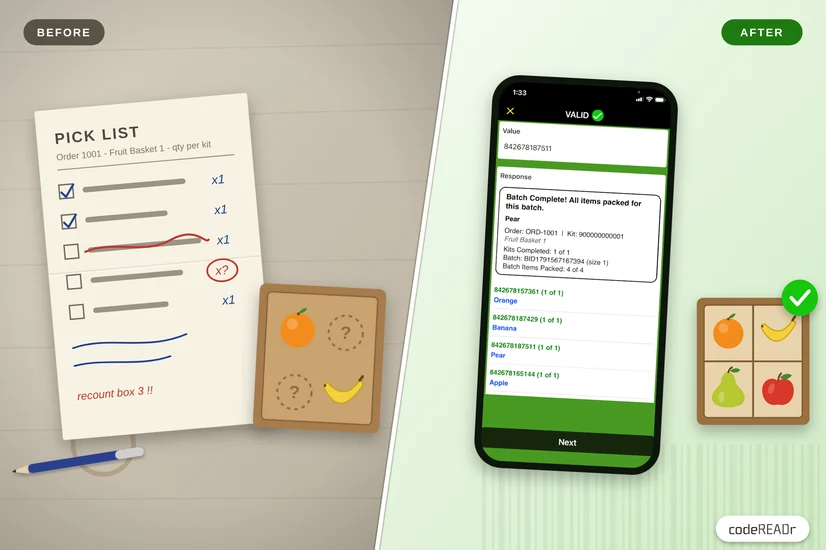
Every scan gets an answer on the spot: a green VALID with the order’s progress, or a red INVALID with the reason.
In September we wrote about how indexed barcodes deliver near-perfect receiving accuracy. Verify Manifest brings the same idea to items that already carry barcodes of their own, so there are no item labels to print.
How it works
Two steps happen in your browser, and three happen in the CodeREADr app.
- Build the list. On the service’s Generator tab, enter a List ID (an order, PO, shipment, or bill of lading number), then add each item ID and its quantity. Type the rows, paste them straight from Excel, or import a CSV or TSV file.
- Print the manifest barcode. Click Generate Manifest, then encode the value as a QR code on your packing slip, pick ticket, or bill of lading. Already running a WMS, ERP, or label software? It can print the manifest barcode instead, as long as the value matches the format.
- Scan the manifest. In the CodeREADr app, the team member scans the manifest to activate the list. The app confirms it, for example “Now verifying List: SO48211”, and shows how many items remain.
- Scan each item’s own barcode, in any order. Every accepted scan shows a green VALID with progress for the whole list and for each item ID. Anything that doesn’t belong gets a red INVALID with the reason.
- Finish the list. The last item shows “Last item verified. List complete.”
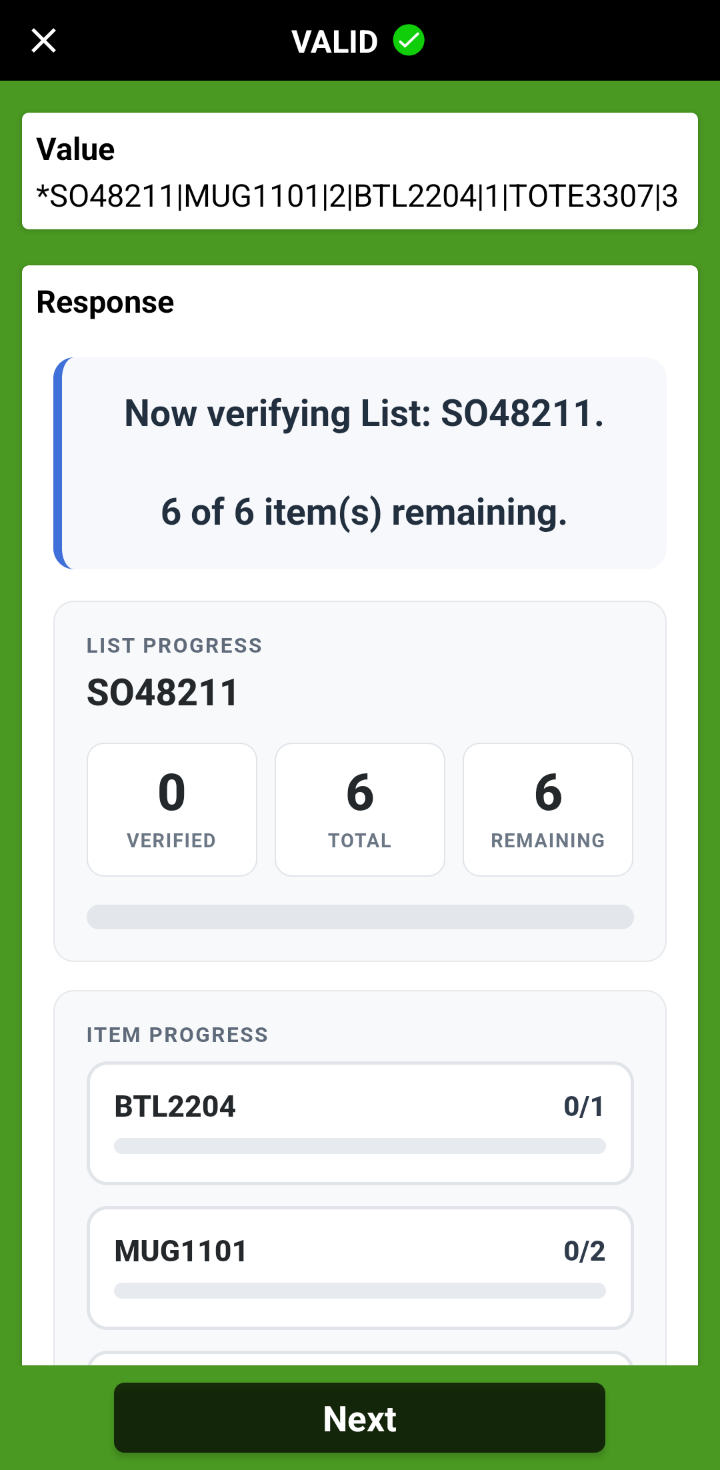
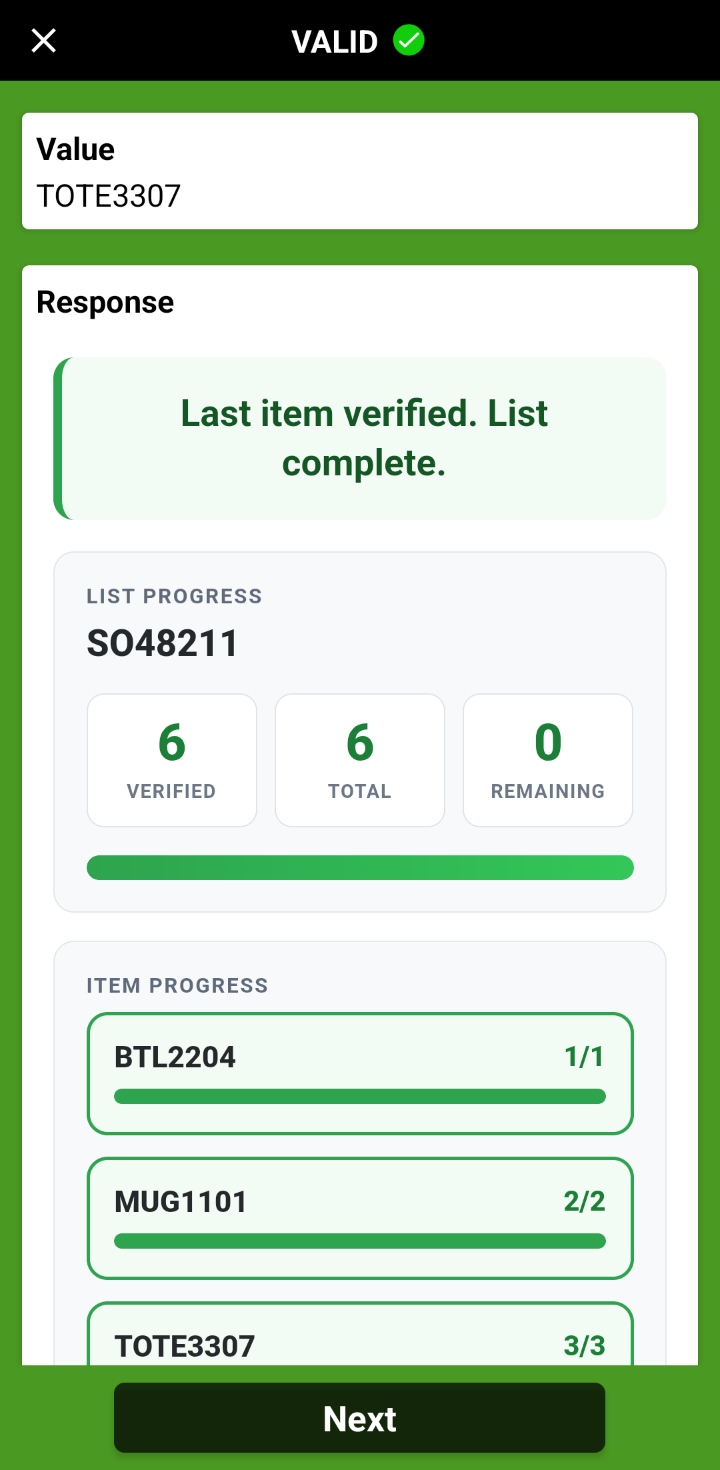
Scanning the manifest starts the order; the last item closes it out.
Want to see it before you print anything? Show Sample on the Generator tab puts the manifest QR code and test barcodes for up to 12 items on your screen. Scan them from your monitor with the CodeREADr app to walk through the whole flow.
What’s inside the manifest barcode
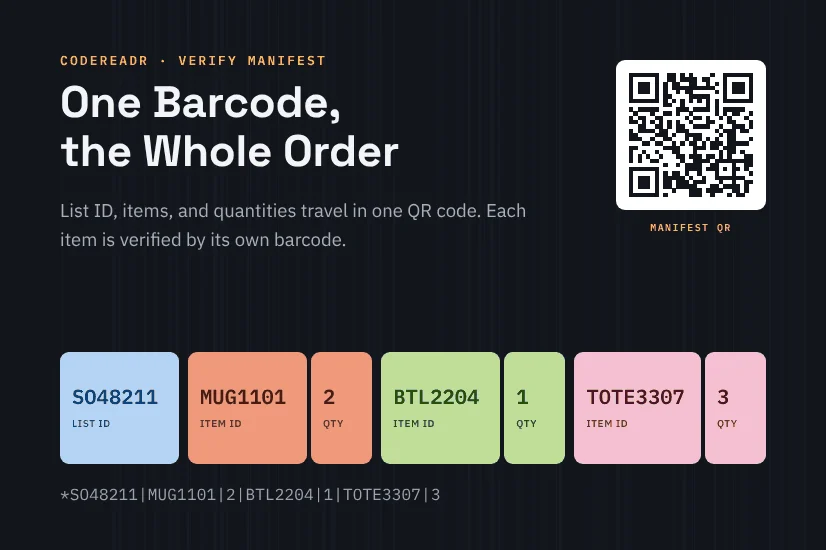
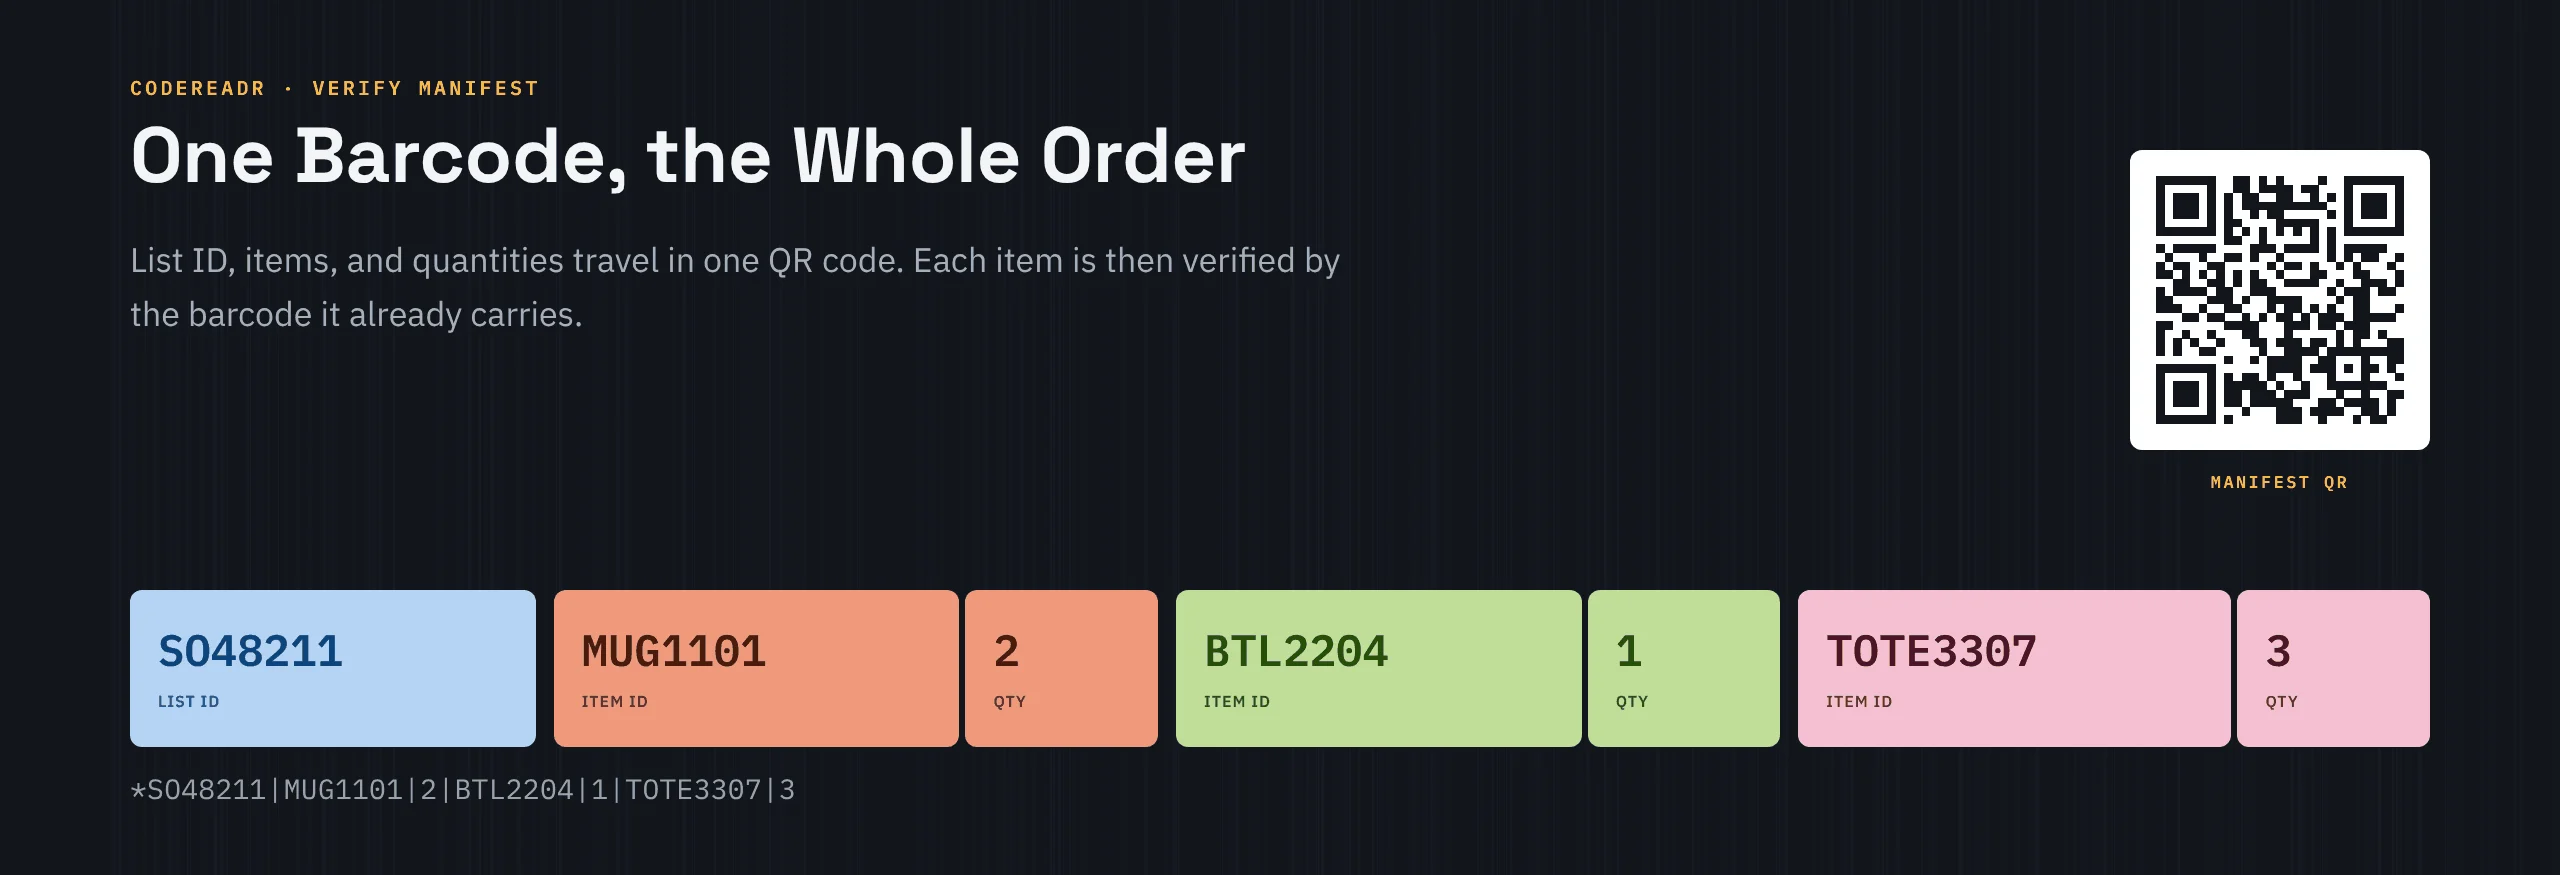
The manifest barcode holds the list ID, then each item ID and its quantity. A * marks the barcode as a manifest, and a | separates the parts. Order SO48211, for two MUG1101, one BTL2204, and three TOTE3307, looks like this:
| Barcode | Format | Example |
|---|---|---|
| Manifest barcode | * List ID | Item ID | Quantity | Item ID | Quantity … |
*SO48211|MUG1101|2|BTL2204|1|TOTE3307|3 |
| Item barcode | The item’s own barcode value, exactly as it appears in the manifest | MUG1101 |
- List ID: your identifier for the list, such as an order, PO, shipment, or bill of lading number.
- Item ID: the value your item’s barcode already contains, such as a SKU or UPC.
- Quantity: how many units of that item the list calls for.
You don’t have to build this string by hand; the Generator does it for you. Because the whole list travels with the barcode, there’s no database to upload and nothing to connect to your ERP or WMS.
A manifest can hold up to 200 different item IDs. Each one makes the QR code denser, so above 40 the Generator warns you to print one manifest and test-scan it on every kind of device you’ll use. For lists bigger than one barcode can carry, split them into smaller lists.
What it catches, on the spot
Every scan is checked against the active list the moment it’s made, so mistakes surface at the bench or the dock, not days later in a cycle count or a customer complaint. The app rejects a scan with a red INVALID and tells the operator why when:
- The item isn’t on the list. “Item CUP4410 is not on the active list: SO48211.” It may belong to another order, so it gets set aside.
- There’s one too many. “Item MUG1101 already fully verified (2 of 2).” The list called for two, and a third just turned up.
- No manifest was scanned first. “Scan a list barcode first — no active list.” The item can’t be checked until the app knows which order it’s for.
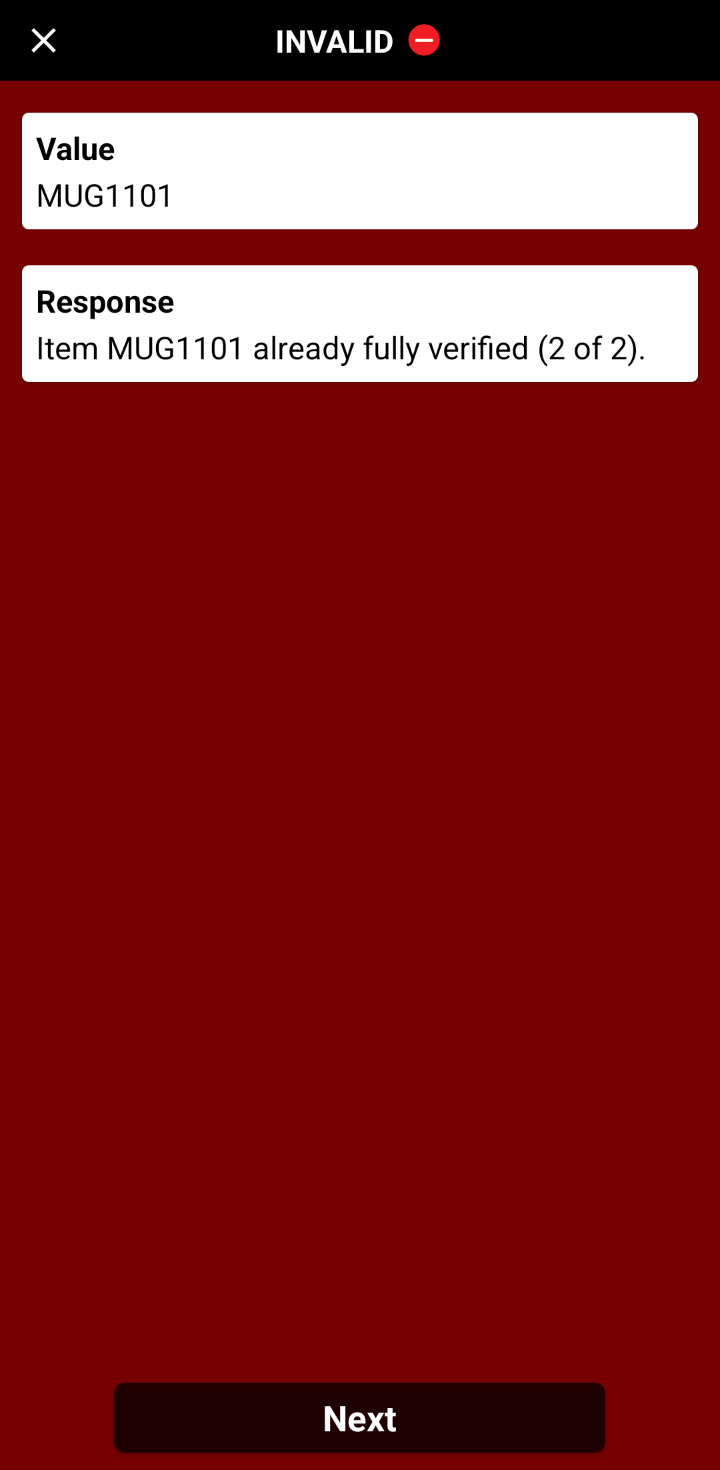
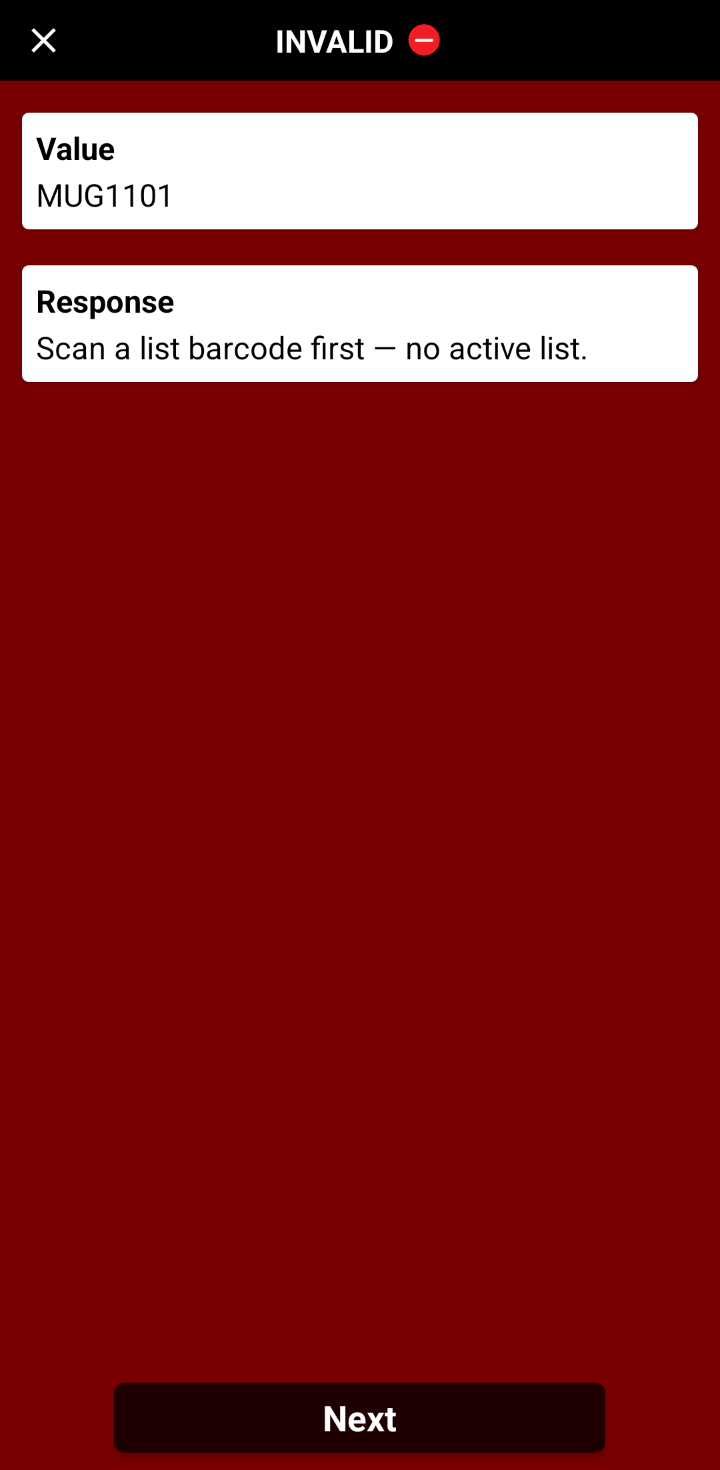
Left: one unit too many. Right: an item scanned before any manifest.
Short counts aren’t rejected, because nothing was scanned to reject. The list simply stays incomplete, and the Monitor tab shows it. Every rejected scan is still recorded, too, so it appears as a discrepancy with who scanned it and when.
Item barcodes must match the manifest exactly, including capital letters and leading zeros. Use a new list ID for each order or delivery, since progress belongs to the list ID and reusing one carries its earlier scans forward.
Built for teams, visible from the web
Big orders rarely belong to one person. Several app users can work the same list at once on their own devices, and they share its progress, so a unit one person verifies counts for everyone.
People can also move between orders. Scanning a different manifest switches to that list, and the app says so: “Switched to List: SO48212 (was SO48211).” Progress is kept, so scanning the first manifest again picks up exactly where it left off.
From the web, the Monitor tab shows every list scanned with the service:
- Status for each list: Complete, In progress, or Stalled (not complete and not scanned for 24 hours).
- Discrepancies by reason, such as Not on this list, Over count, or No active list, with a chip to filter down to the lists that have them.
- List details: item-level progress, an exception log of rejected scans showing who scanned them and when, and a timeline of recent scans.
The Scans tab holds every scan record, and account owners and admins can filter and export them for reporting. Need a receiving partner or customer to scan on their end? Create an app user for them, and they can verify against your manifest with the CodeREADr app.
Verify Manifest or Verify Generated List?
Pick Verify Manifest when your items already carry barcodes; pick Verify Generated List when they don’t, or when every unit needs its own record.
| Verify Manifest | Verify Generated List | |
|---|---|---|
| Your items | Already carry their own barcodes (UPC, SKU) | Don’t need barcodes of their own |
| What you print | One manifest barcode per list | One list barcode plus an indexed label for every unit |
| List size | Up to 200 item IDs per manifest | Up to 5,000 items per list |
| How units are counted | By quantity of each item ID | Each unit is identified by its own label |
Identical items typically share the same barcode. If an app user scans the same item twice, that could lead to a counting error. If that’s a concern, Verify Generated List gives each unit its own label, so no unit can be counted twice. Both services share progress across your team, report discrepancies on the Monitor tab, and need no ERP or WMS integration.
Can Verify Manifest work with RFID?
Absolutely. Contact support@codereadr.com to learn when the RFID version will be launched.
Get started
Verify Manifest is live now. On the Add Service page, select Verify Manifest, build your first list on the Generator tab, and scan the sample from your screen.
- Step-by-step setup: the Verify Manifest Specialized Service article walks through every tab, app message, and fix.
- Devices: CodeREADr runs on iOS and Android phones and tablets as well as dedicated mobile computers. Scans are validated in the cloud as they’re made, so devices need Wi-Fi or cellular data while scanning with this service.
- Pricing: all paid plans include unlimited scans and are priced by the number of unique devices signed in during a billing period.
New to CodeREADr? Sign up free, or schedule a meeting and we’ll map your pick, pack, or receiving process to the right setup.