How to Validate Tickets with Smartphones and Tablets
Step-by-Step Tutorial
Please read our Best Practices: Ticket Validation / Access Control article for more information.
Sign in to CodeREADr.com
1. Create Service
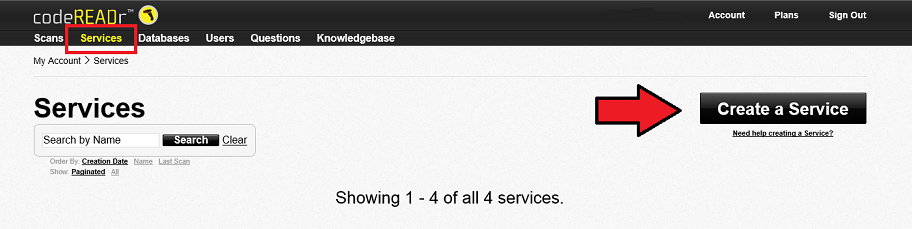
To create a service select the ‘Services’ link in the navigation panel, and then select ‘Create a Service’ button.
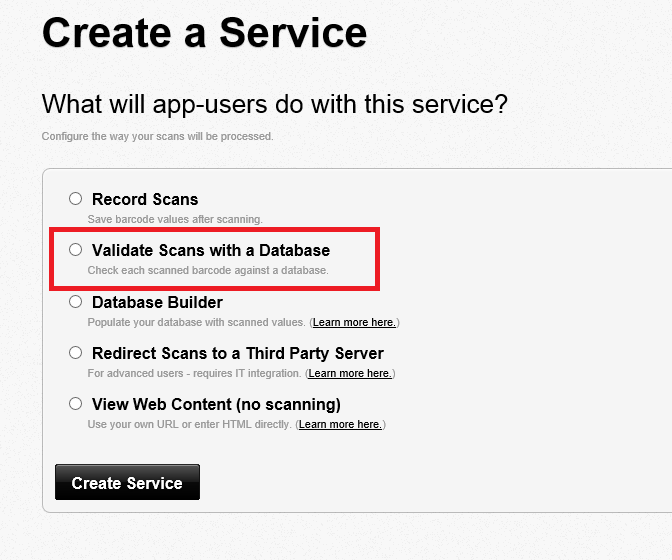
2. Select ‘Validate Scans with a Database
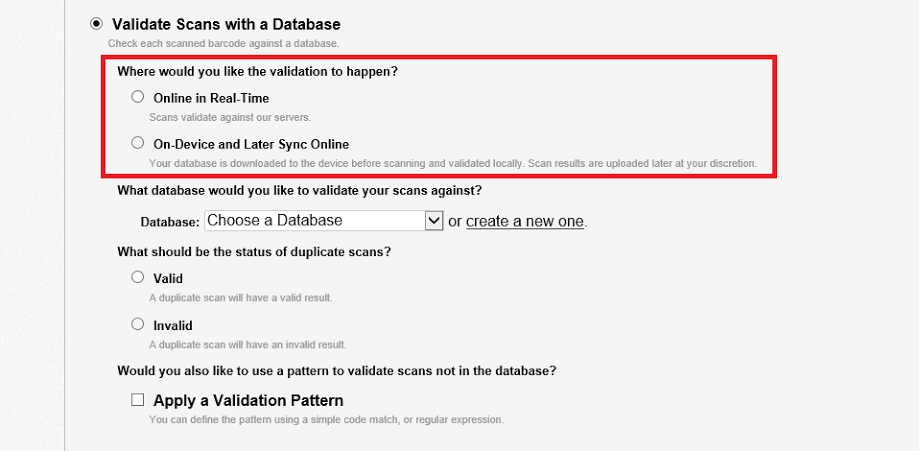
Set Where to Validate
Our Recommendation: Select to validate ‘On-Device and Later Sync Online’ as many indoor locations do not have stable internet connections throughout the facility.
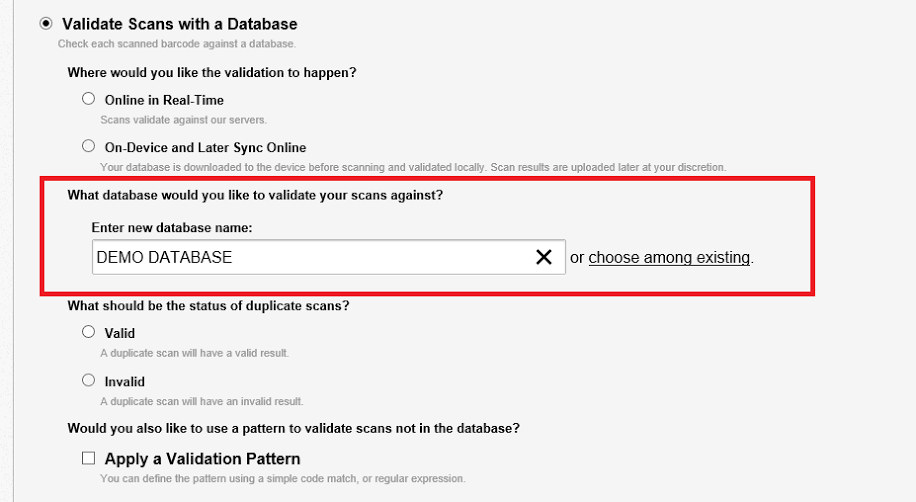
Create a New Database
Provide the name of your database here, you will build your database later in step 8.
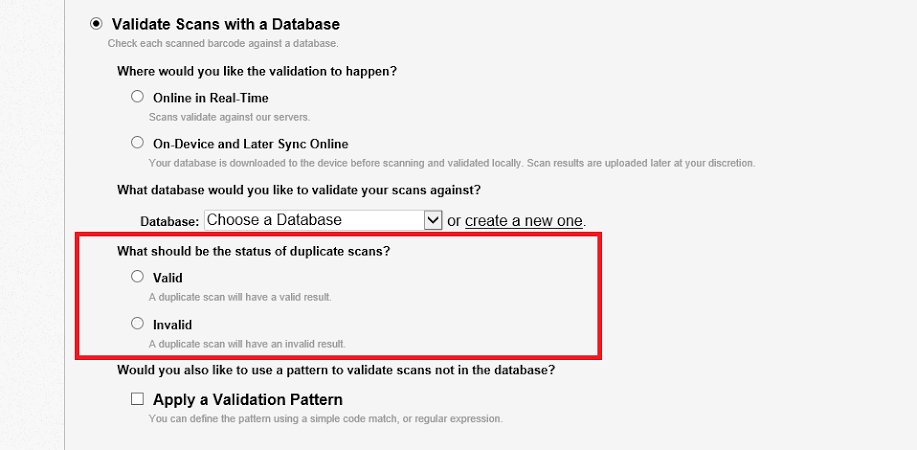
Status of Duplicate Scans
By default, any scan that has already been scanned will be marked as ‘Invalid’. You can change this to ‘Valid’ if you need to scan the same barcode more than once.
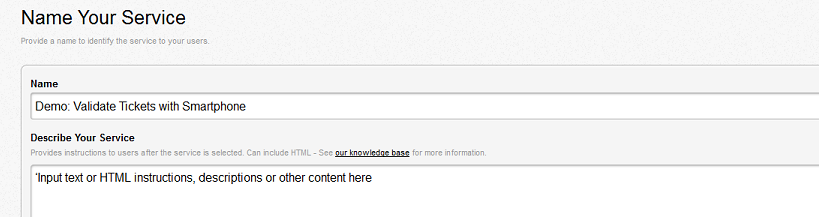
3. Name Your Service
You can optionally add a description for the app user to see.
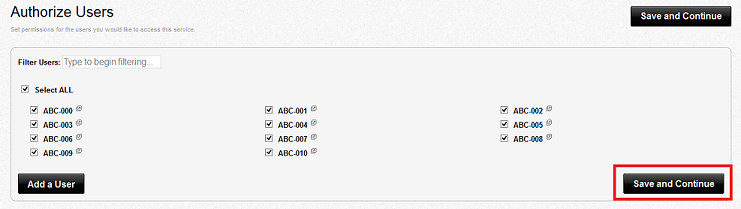
4. Authorize App Users for Access to this Service
Note: You can have an app username and password for each app user or a single one for all users.
We suggest you add one or more app-users. A common method is to have the username prefix be the initials of your organization followed by text or numbers, e.g. ABC-001, ABC-002, etc.
5. Add Questions for Data Collection
[Optional. For fast access control, skip to Step 6.]
You can add one or more Questions (prompts) for data collection. Create your own custom questions or select questions from the list of ‘Available Questions’.
Most Ticket Validation services do not contain any questions at all. If used, the most common prompts for Ticket Validation are ‘Short Answer’ question types, ‘Multiple Choice (Single Answer)’ question types, and ‘Photo Collect’ question types where a photo can be taken and saved in the scan record.
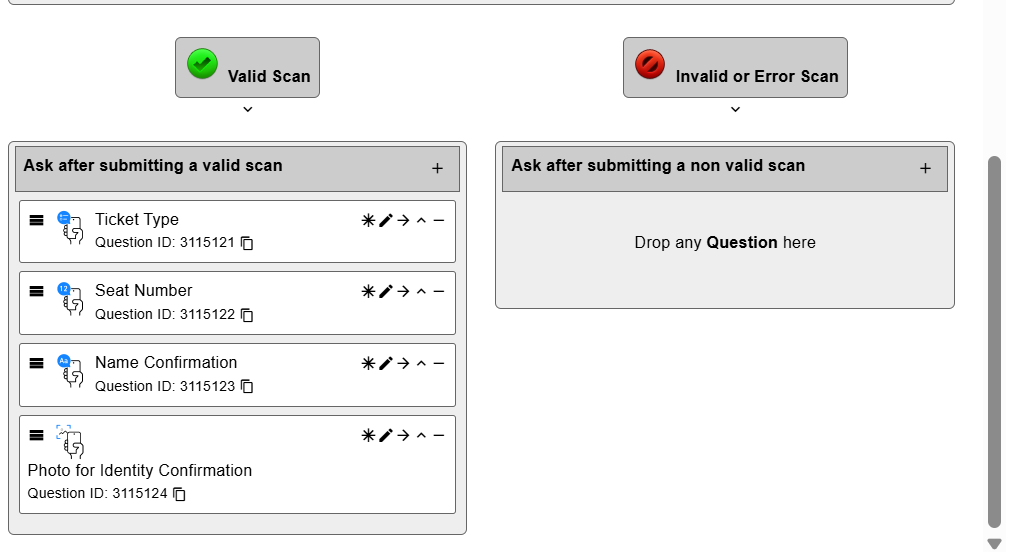
Example of Question Hierarchy
| Question | Question Type |
|---|---|
| Ticket Type (VIP, General Admission) | Multiple Choice: Single Answer |
| Seat Number | Short Answer: Manual |
| Attendee Name Confirmation | Short Answer: Manual |
| Take a photo to verify identity. | Photo Collect |
Select ‘Add a Question’
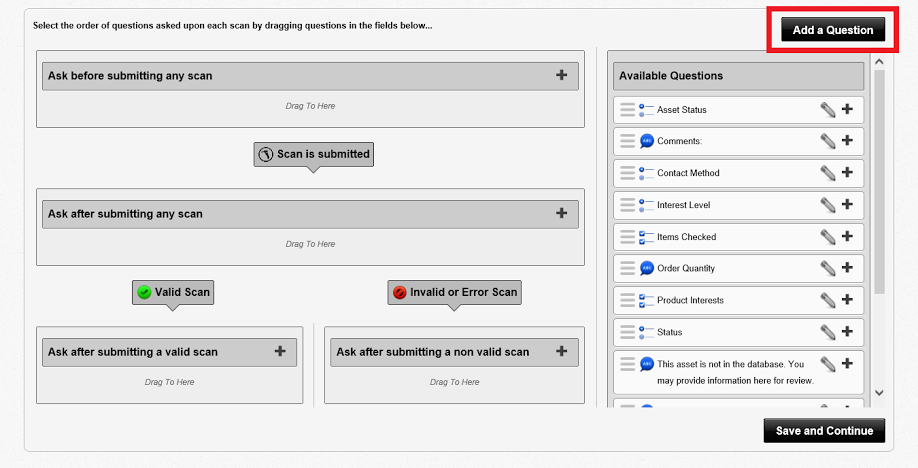
Set What the Questions Respond to and Their Order
Drag the questions from the list of ‘Available Questions’ into the appropriate field to the left i.e. ‘Ask after submitting a Valid Scan’.
6. Advanced options
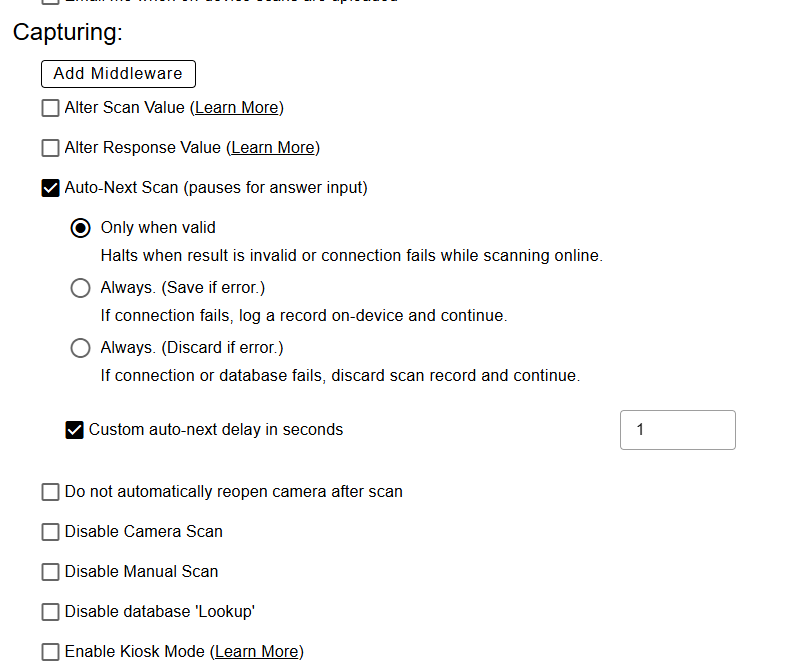
Advanced options are not required for ticket validation, though “Auto Next Scan” is recommended.
Also of note is the Auto Sync option. If using an “On-Device” service, you can choose this option on the Advanced tab if you want scans to sync up to the cloud, and new database values to sync down automatically.
Both processes are completed in the background so the person scanning tickets can keep scanning without interruption. If connectivity is completely lost, then the scans are queued and synced when connectivity is restored.
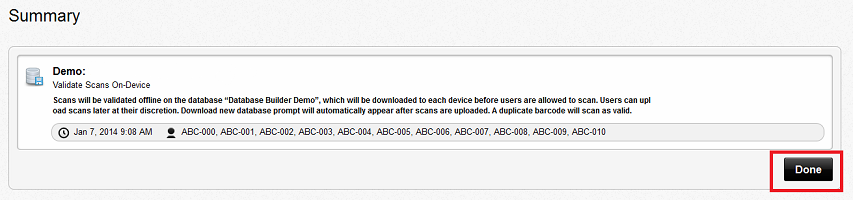
7. Review Service Specifications and Continue