How to Check-In Attendees and Track Attendance with a Smartphone and Tablet App
When you sign up for an account, you’ll see we created several demo apps for you that include a handful of common applications, including one for ‘Attendance’. The Attendance service allows the app user to select from multiple-choice options ‘Check-in, Check-out or Other’ and then enter related comments via text or voice. You can review, edit, copy, or delete these demo services as you see fit or create a brand new service by following the steps below.
Our Best Practices article Student & Member Attendance is also helpful.
Step-by-Step Tutorial
Sign into CodeREADr.com
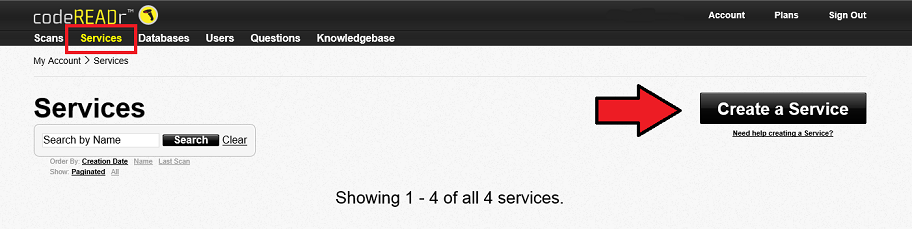
1. Create Service
Select the “Services” link in the CodeREADr navigation panel, then select the “Create a Service” button.
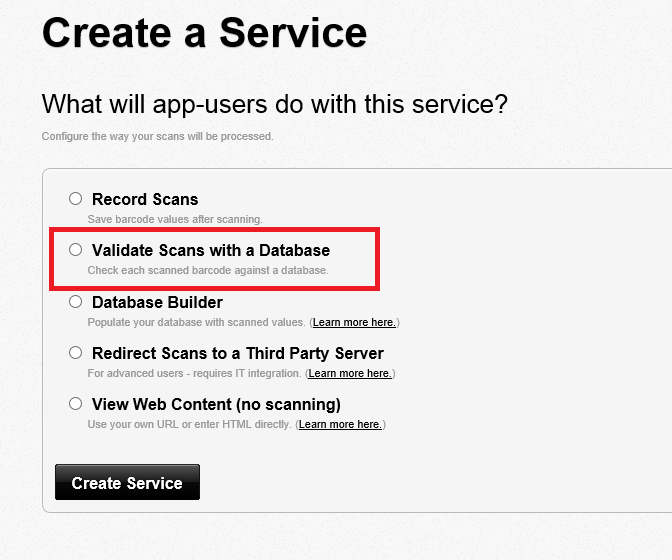
2. Select ‘Validate Scans with a Database’
Note: This article discusses the most common service type for attendance, namely validating IDs against a database. However, if you simply want to record IDs (or names) without first validating IDs, you can instead create an online or on-device (i.e. offline) ‘Record Scan’ service type.
Set Where to Validate
Our Recommendation: Select to validate ‘On-Device and Later Sync Online’ as many indoor locations do not have stable internet connections throughout the facility.

Select a Database
Select the database against which scanned IDs will be validated. You can also create a new database – simply name it here and later you’ll manually add or upload an ID database of your customers, students, members, attendees or employees, etc.

Status of Duplicate Scans
You can set duplicates to ‘Valid’ to ‘Invalid.’ By default, any scan that has already been scanned will be marked as ‘Invalid’. Here you can change this to ‘Valid’ if you need to scan the same barcode more than once for the same event or service.


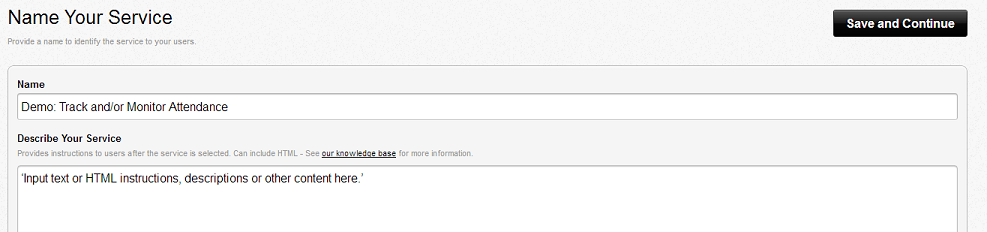
3. Name your Service
You can optionally add a description to your service.
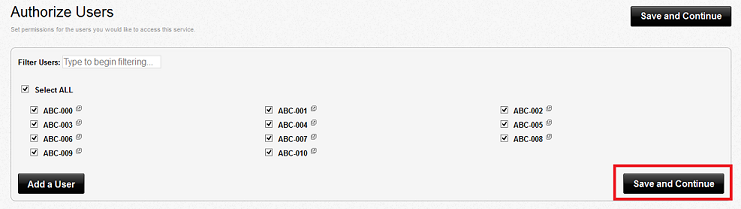
4. Authorize Users
Select the App User(s) you authorize to scan for this Service (add new Users now or later).
Click the “Services” link in the CodeREADr navigation bar at the top of the page.
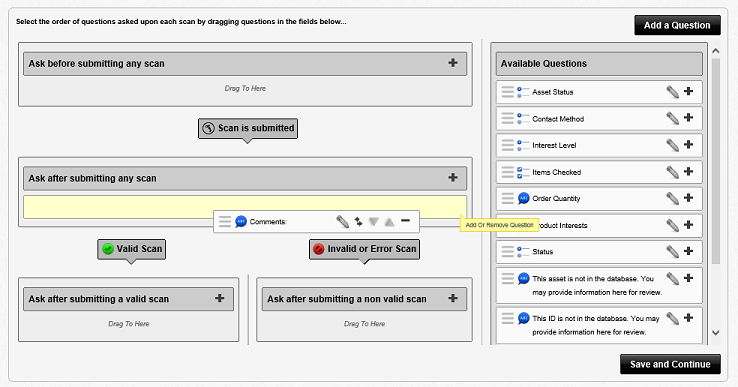
5. Collect Data After Each Scan
Optional. the ‘Questions’ tab enables your app users to collect data after each scan. You can create your own questions or use standard ones. For example you can use the standard ‘Comments’ question for app users to enter text or voice comments, or use the standard ‘Status’ multiple choice selection for ‘Check-In / Check-Out / Other’ to track total time.
In order for questions to be included in the service, you must drag & drop them in the appropriate order from the list of ‘Available Questions’ to the appropriate fields to the left. To create a custom question, select the ‘Add a Question’ tab located above the list of ‘Available Questions’ on the right side of the page.
Note: This feature is not recommended when fast, repetitive scanning is required since the app user will need to stop to answer the questions before scanning the next barcode.
6. Advanced Options
Advanced options are not required to track and/or monitor attendance. Select whichever Advanced Options that suit your needs. For example, you might want to track the location of the app user as they are scanning. Or, you may need to use ‘Alter Scan Value’ if the IDs you are scanning need parsing to match the IDs in the database. We can write the script for you on request (support [at] codereadr.com).
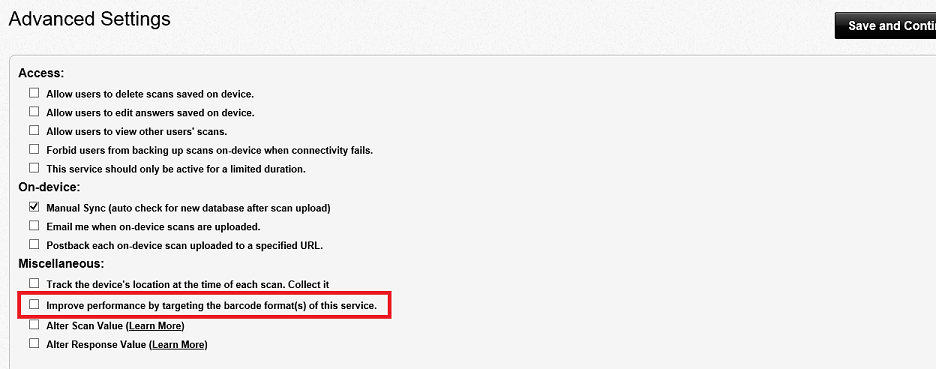
Note: The Advanced Option “Improve performance by targeting the barcode format(s) of this service” can improve the functionality of the scanning engine on your device.
If you are unsure of the name of the barcode type you plan to use: Go to the ‘SD PRO – Try It’ option on the app’s sign-in page as it will identify the barcode symbology after each scan
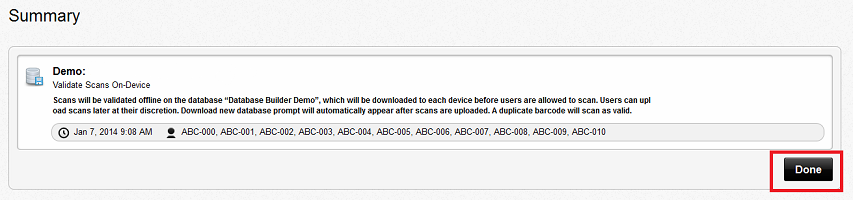
7. Review
Review Service Specifications and click ‘Done’ to finalize your service.